Pull a survey unit from the queue to track its status and process it. #
To pull a survey unit from a specific queue so you can fill in its data, review it, or validate it, follow these steps:
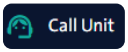
- From the side control menu, select “Call Unit”.
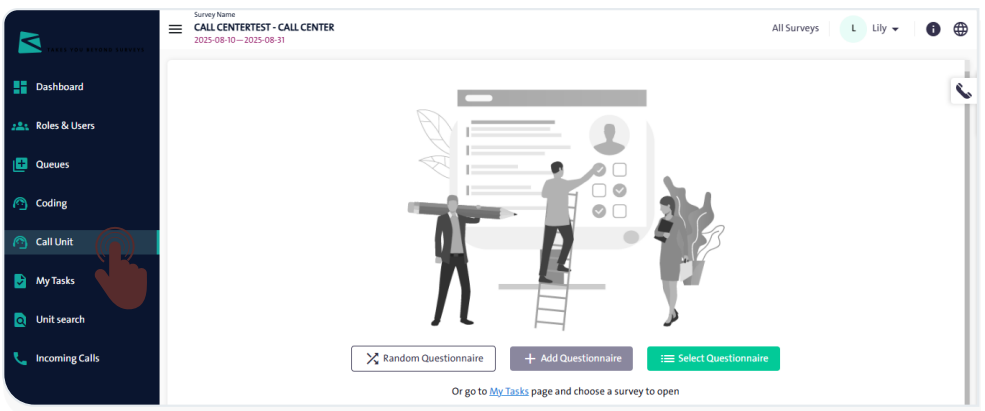
- Click “Random Questionnaire” to pull a random survey from the available surveys within the queues you are authorized to access.
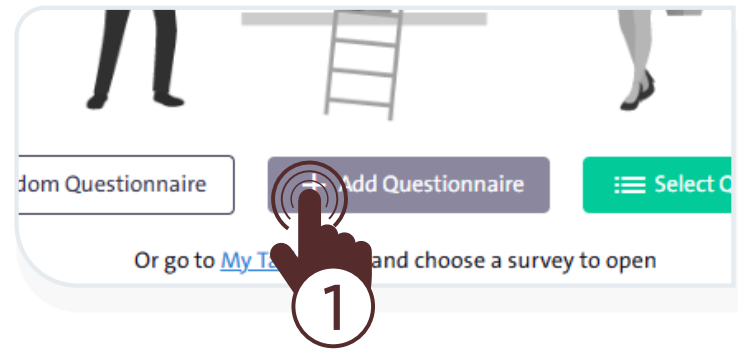
- Click “Add Questionnaire” A window will pop up then follow the steps below:
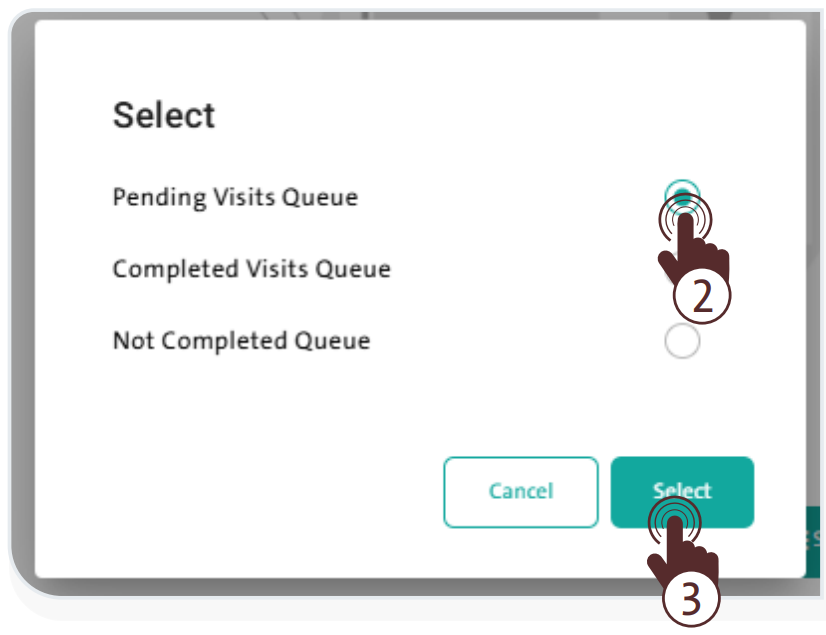
– Select the queue you are authorized to access.
– Click “Select” to pull a random survey from the chosen queue.
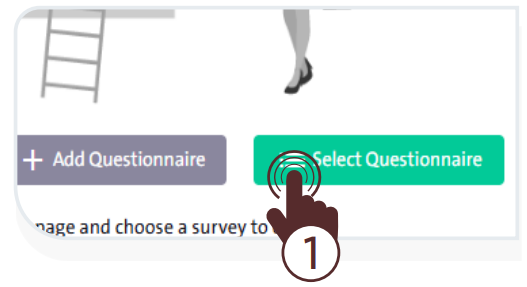
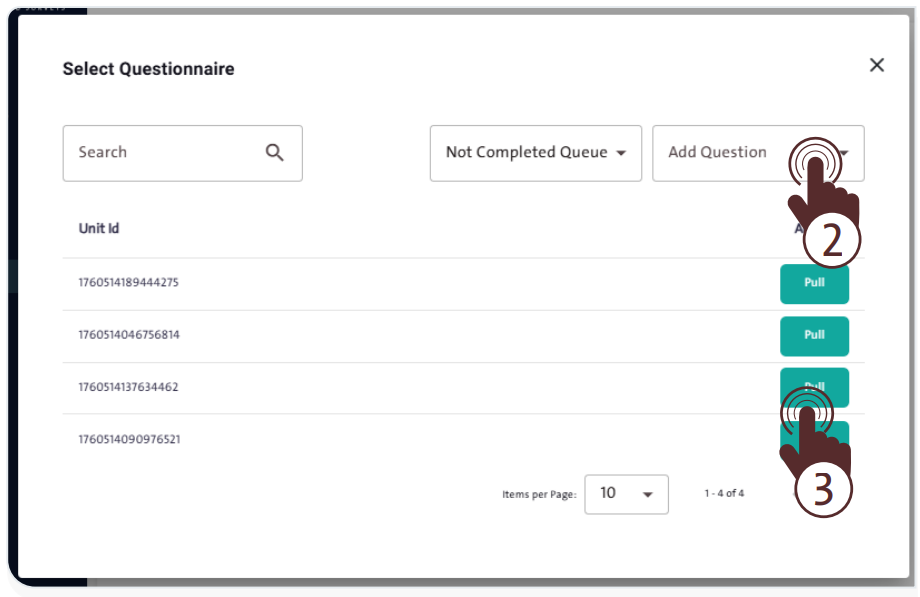
- Click “Select Questionnaire”; a window will appear allowing you to search for a specific survey, select the desired queue, and choose the question you want to add, as shown in the following image:
To make a call with the contacts linked to the unit pulled, follow these steps:
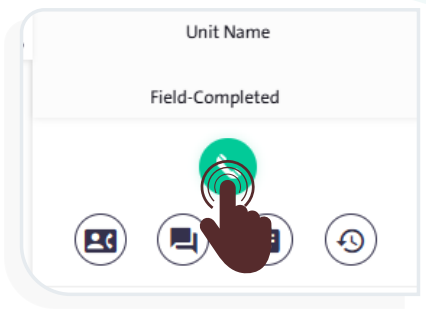
- Click “Call”
 to start the call.
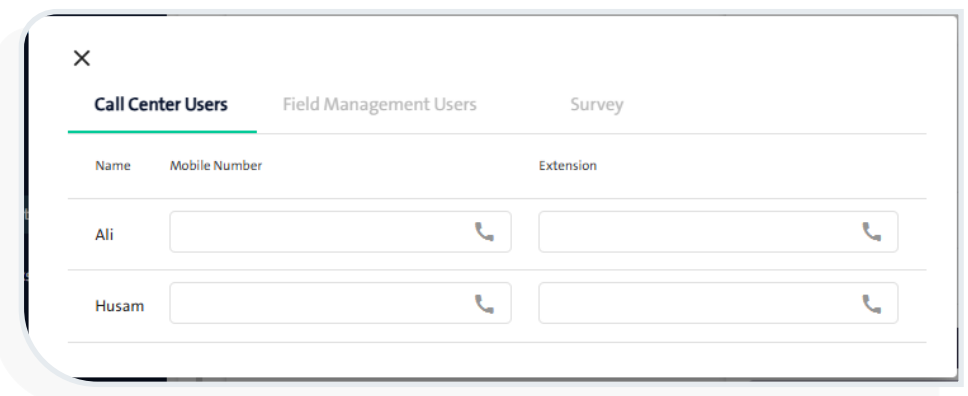
- Select the call recipient from one of the following parties:
- Call Center Users
- Field Management Users
- Survey
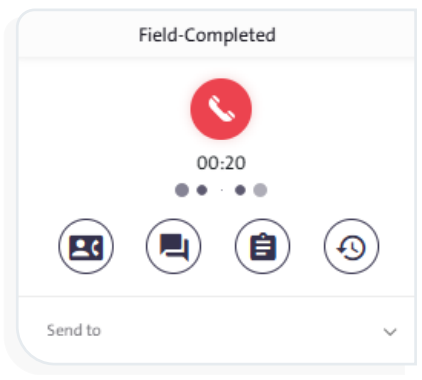
- To end the call with the recipient, click “End Call”
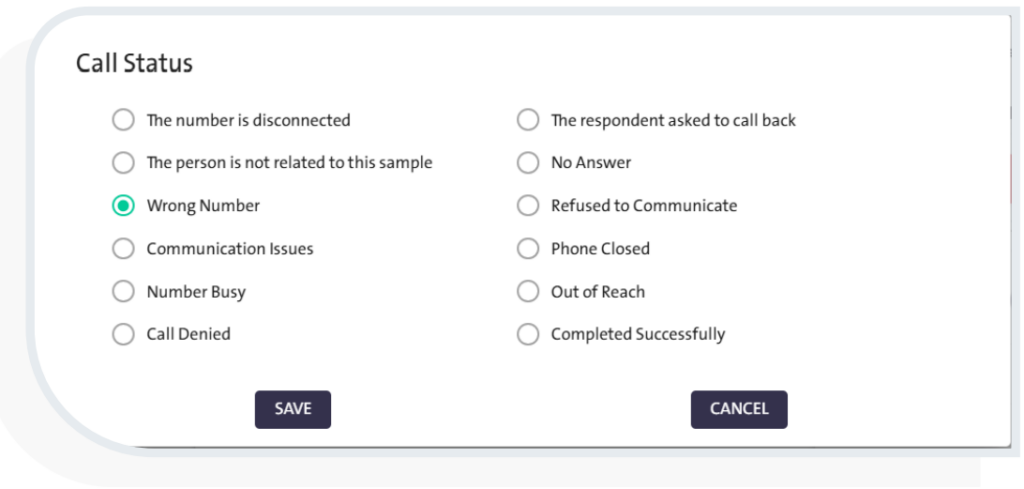
 or click “End” The “Call Status” window will pop up, where you can set the status of the pulled unit by following these steps:
- Select one of the following available options:
– Call Denied
– Communication Issues
– Completed Successfully
– No Answer
– Number Busy
– Out of Reach
– Phone Closed
– Refused to Communicate
– The Number is Disconnected
– The person is not related to this sample
– The respondent asked to Callback
– Wrong Number
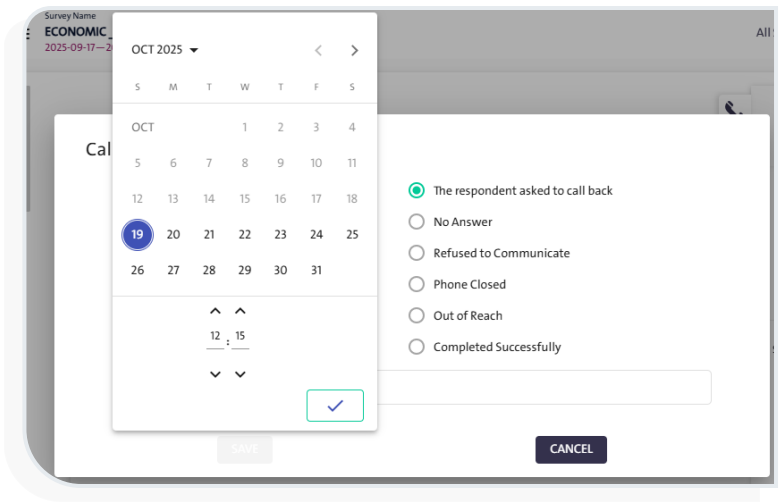
When selecting the call status “The respondent asked to call back” the system will prompt the user to specify the date and time for the deferred call, as shown in the following image:
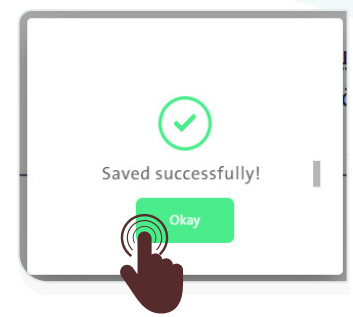
- Click “Save”
 to complete the process.
– A confirmation message “Saved successfully!” will appear on the screen.
– Click “Okay”  to close the message and return to the previous screen.
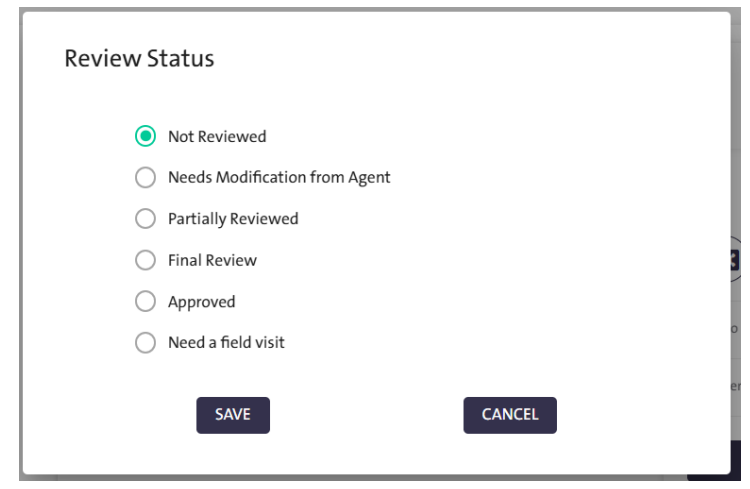
- Set the “Review Status” upon completion. The available statuses include:
– Approved
– Final Review
– Needs Modification from Agent
– Not Reviewed
– Partially Reviewed
– Need afield visit
- Edit the form unit according to the call results, then click “Save and Sent”.

Additional Call Options: #
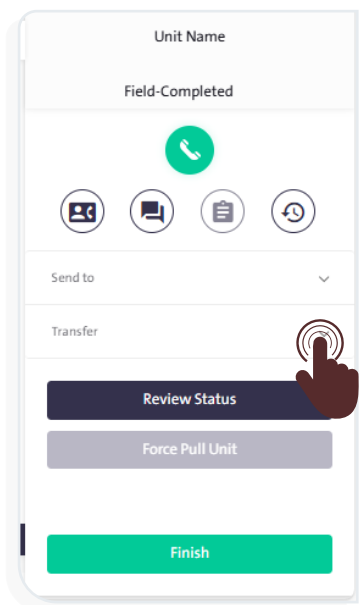
First: Call Transfer #
The form can be transferred so that its questions are answered either by sending it to the respondent’s email or by assigning it to a field employee to complete the form data. To do this, follow these steps:
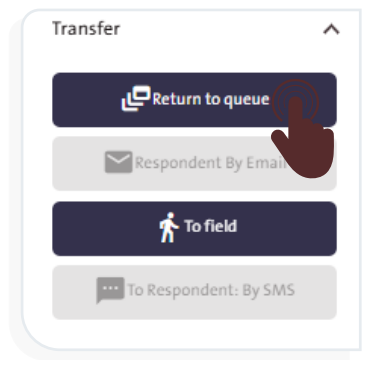
- Click “Transfer”
 .A dropdown list with transfer options will appear, as shown in the adjacent image.
- From the list, choose one of the following options:
- Return to Queue
- Respondent By Email
- To Field
- To Respondent By SMS
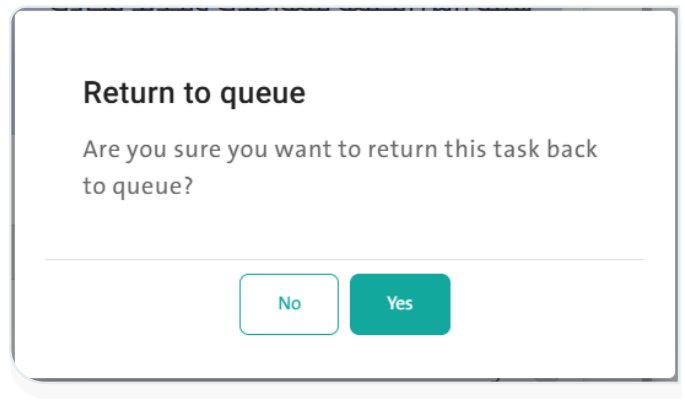
- When selecting “Return to queue” a window will appear asking you to confirm returning the survey to the queue waitlists, as shown in the following image:
- When selecting “Respondent by Email” a window will appear enter the email subject and recipient address, select an email template, then click “Send”.
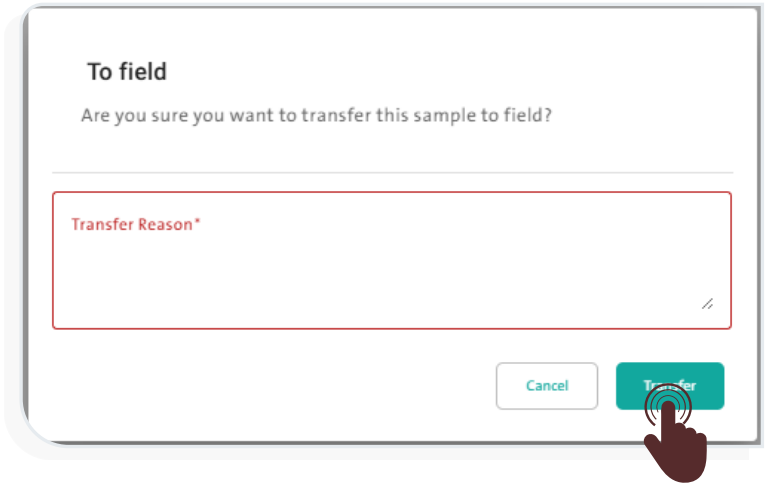
- When selecting “To Field” the following screen will appear enter a reason for transferring to the field, then click “Transfer”.
- When selecting “To Respondent by SMS” a window will appear allowing you to send the survey to the respondent by SMS, by following these steps:
– Enter the phone number in the designated field.
– Add your notes in the provided text box.
– Click “Send” to complete the process.

Second: Forwarding the Call #
You can forward a survey unit by clicking “Send To” and selecting one of the following destinations if you are unable to handle it:
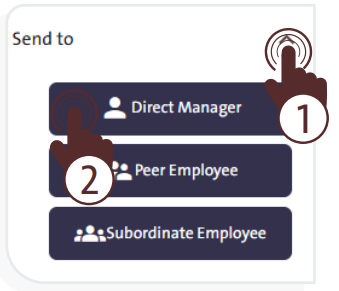
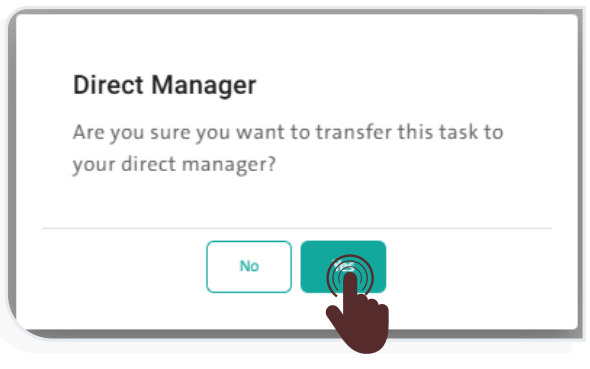
- Direct Manager:
To transfer the sample to your direct supervisor, click “Yes” in the confirmation pop-up window.
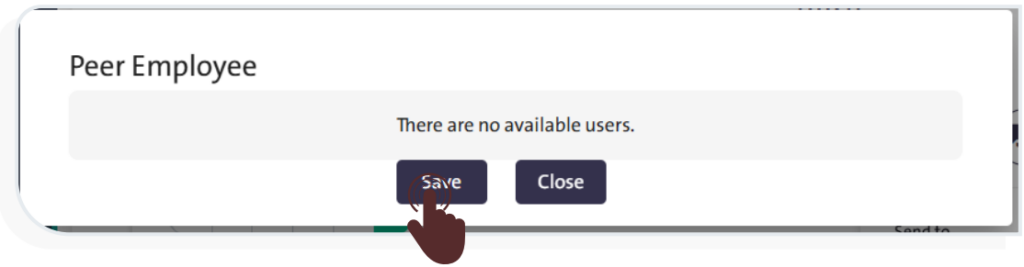
- Peer Employee:
To transfer the sample to another employee at the same administrativ e level, select the user in the pop-up window, then click “Save”.
- Subordinate Employee:
To transfer the sample to a subordinate employee, select the user in the pop-up window, then click “Save”.
Third: View Call Logs #
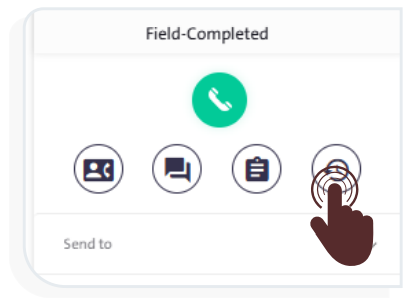
To view the log of calls you have made, click “Call Log”  A screen will pop up displaying the following information:
- Call Status
- Call Date
- Call Start Time
- Call End Time
- Destination Number
- Call Notes
- Agent Name

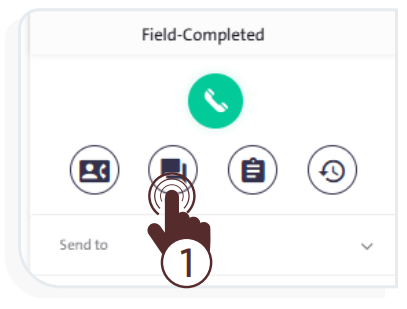
Fourth: Team Messages #
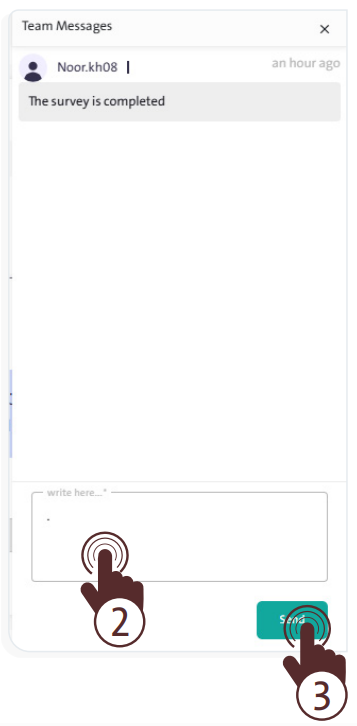
To view the messages of the queue’s work team, click “Team Messages” This feature allows you to send notes about the form that your team can view and discuss in a related conversation. To do this, follow these steps:
- Write your message in the “Message”
 field.
 - Click “Send”
 . The message will then be visible to your team members.
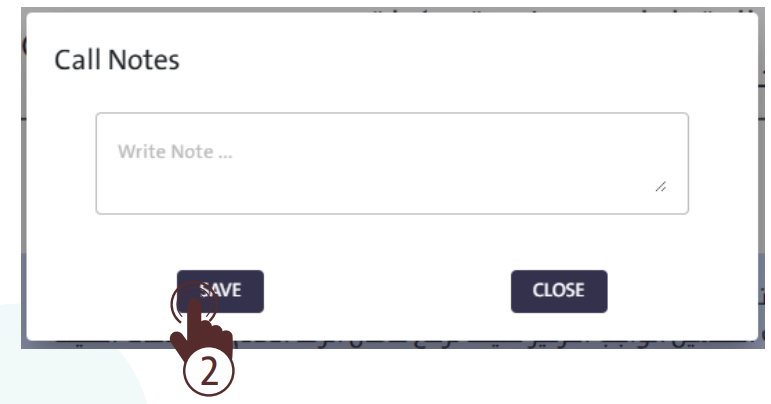
Fifth: Call Notes #
- To record your notes at the call level only, click “Call Notes”
 Then, write your note in the “Write Note” box and click “Save”.
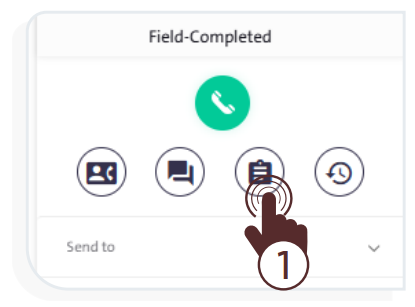
Sixth: Survey Log #
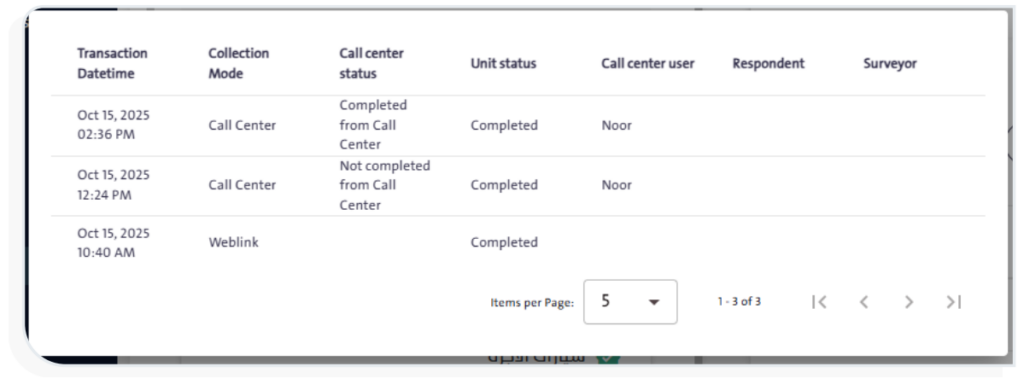
To view the log of a sample, click the “Survey Log” icon  . A table will appear containing the following data:
- Transaction Date and Time
- Collection Mode
- Call Center Status
- Unit Status
- Call Center User
- Respondent
- Surveyor