
Configure the survey settings for Field Management. #
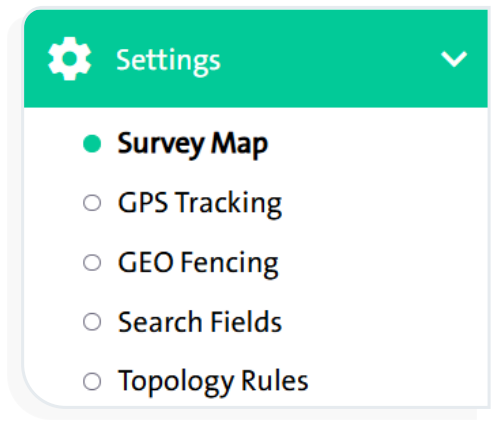
The Settings screen allows you to configure the following options:
- Survey Map
- GPS Tracking
- GEO Fencing
- Search Fields
- Topology Rules
First: Survey Map #
This option allows you to configure the survey map settings by selecting layers, as well as the assignment and survey levels. To do this, follow these steps:
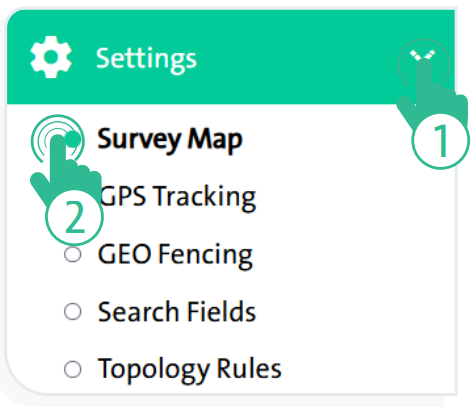
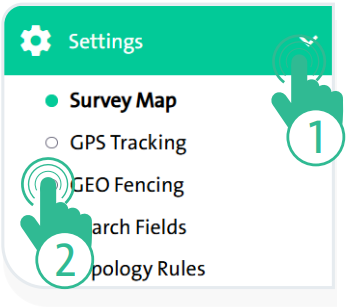
- From the side control menu, select “Settings”
 .
.
- Click “Survey Map” , and two tabs will appear: “Layers” and “Functions”.
- Select the “Layers” tab to configure the following options:
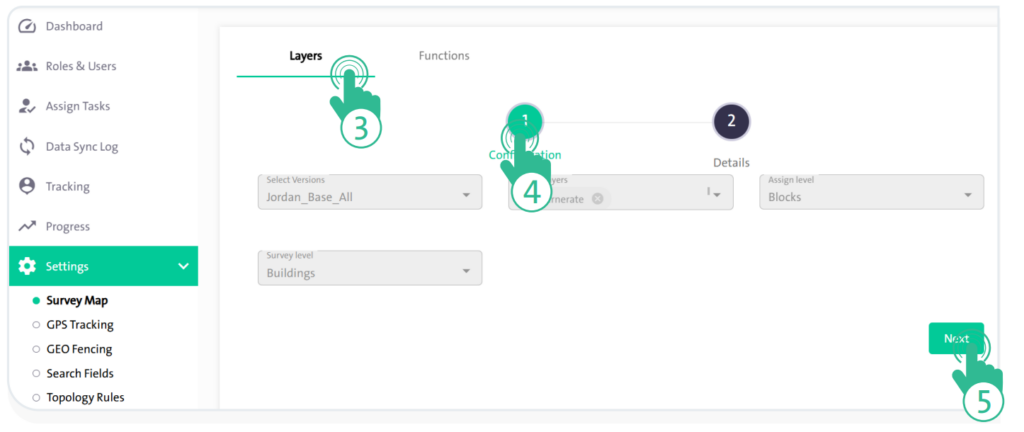
- “Configuration” Tab:
- This tab allows you to manage the layer version, assignment level, and survey by following these steps:
- From the dropdown menu, select the required layer version.
- From the dropdown menu, choose the desired layers.
- From the dropdown menu, select the assignment level.
- From the dropdown menu, select the survey level.
- Once you finish configuring the above options, click “Next”
 to proceed to the Details tab.
- This tab allows you to manage the layer version, assignment level, and survey by following these steps:
- “Details” Tab:
- Through this tab, you can manage the detailed settings of the layers by following these steps:
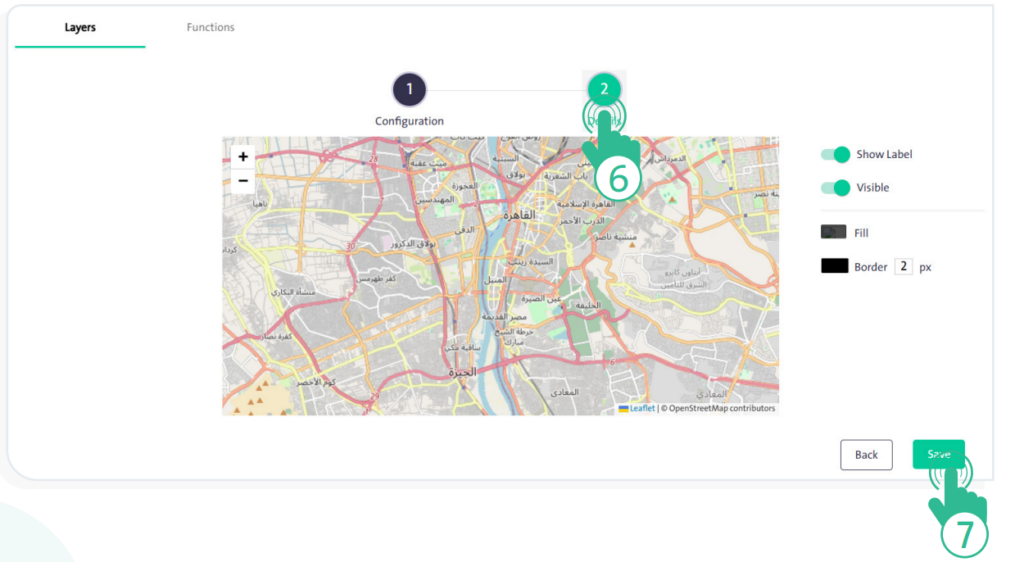
- The options you can manage, which appear on the left side of the map, depend on the layer you previously selected. Examples of these options include:
– Show Field Name
– Visible
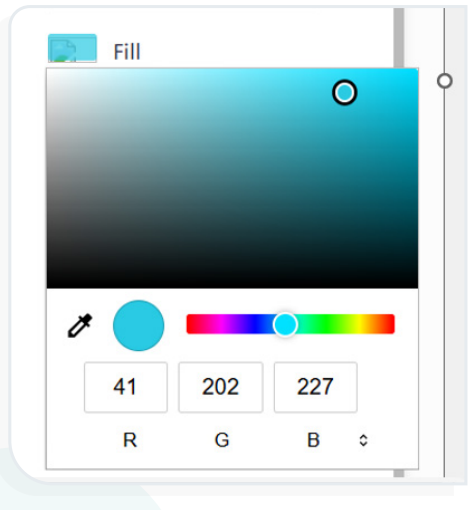
– “Fill Color”: Specify the fill color inside the layer.
– “Border Color”: Specify the border color of the layer.
– “Border Thickness”: Specify the thickness of the layer’s border.
– “Add Icon”: Select the icon to be placed on the map to mark assigned task locations.
– “Icon Color”: Highlight the icon with a specific color.
– Task achievement status colors, including:
- Completed
- Incomplete
- Deleted
- Not Visited
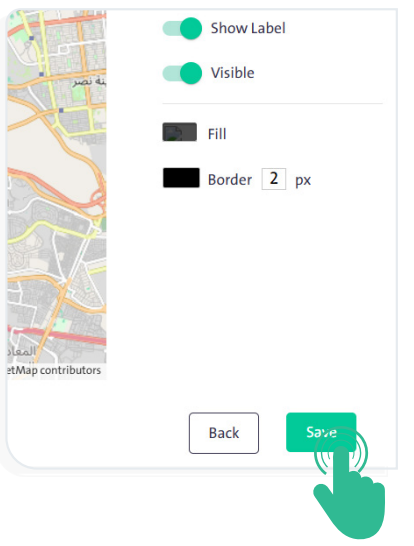
- Once you finish configuring the options in the “Layers” tab, click “Save”
 .
.
You can change the default survey settings colors by clicking on the color and selecting a new one from the color picker.
- Select the “Properties” tab from the “Survey Map” screen to configure the settings that will appear on the map by enabling or disabling them with a click. These include:
- Zoom In/Out
- Distance
- Compass
- Search
- Show/Hide Layers
- Add
- Delete
- Transfer
- Offset
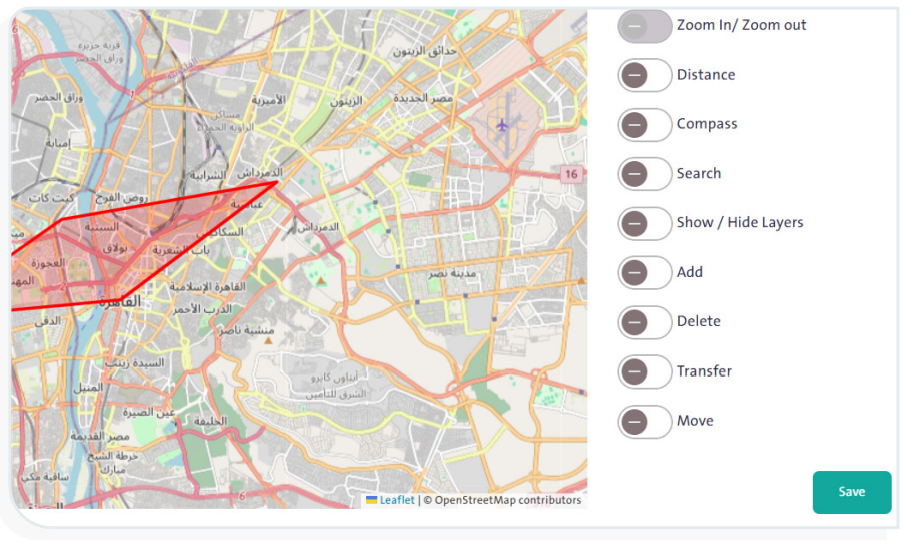
- When you finish configuring the options in the “Properties” tab, click “Save”.
Second: Tracking #
Through the tracking settings, you can configure the process of monitoring field researchers by sending and storing their coordinates within a predefined time period and interval. To do this, follow these steps:
- From the side control menu, select “Settings”.
- Click “GPS Tracking” to display the “GPS Tracking” settings screen, as shown in the following figure:
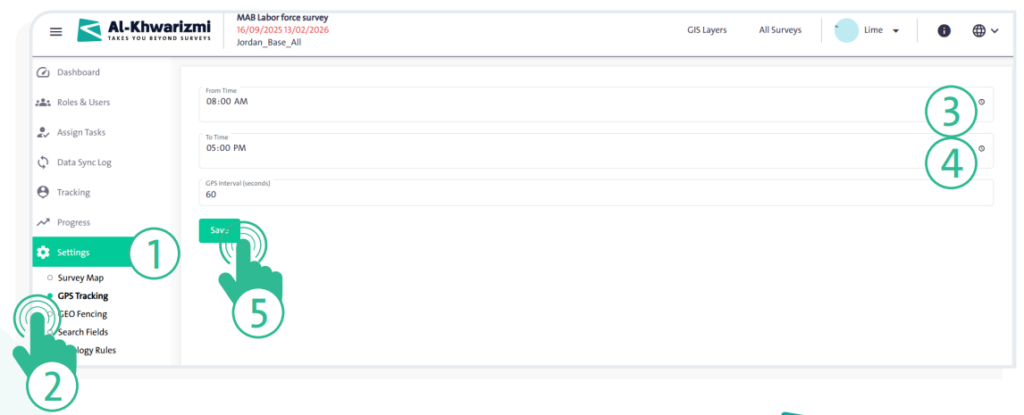
- Set the tracking start time by entering the time in the “From Time” input box.
- Set the tracking end time by entering the time in the “To Time” input box.
- Specify the interval between tracking points in seconds in the “Interval Between Tracking Points (seconds)” input box. This defines the time gap between each recorded coordinate of the field researcher.
- Click “Save” to complete the configuration of the tracking settings.
Third: Geofencing #
Geofencing is the distance between the counting unit (e.g., household, facility, farm, etc.) and the point where the researcher is located. This setting allows the researcher to open and fill out the survey only within this distance. To configure this, follow these steps:
- From the side control menu, select “Settings” .
- Click “Geofencing” to display the “Geofencing” settings screen, where you can configure the password settings, as shown in the following figure:
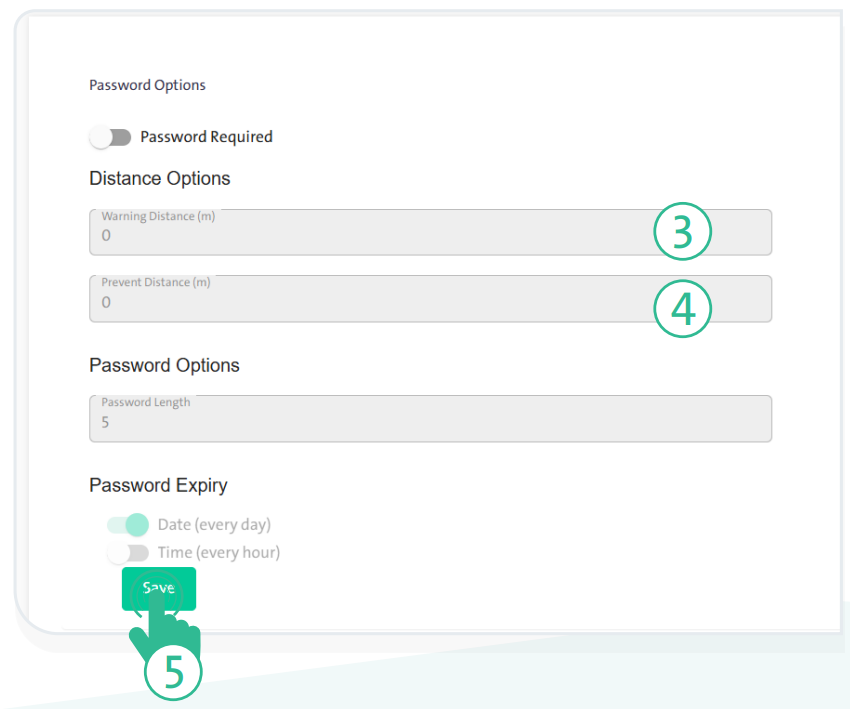
– Enable the “Password Required” option if you want to require the field team to conduct the survey only within the defined geographic distance.
– Configure the distance options by specifying the following:
* Warning Distance:
A safe distance for the researcher, used to ensure the survey is filled out at its actual location. A margin of more than 10 meters is applied. Note that the warning distance must be less than the blocking distance.
* Prevent Distance:
When the researcher exceeds this distance, the system prevents them from filling out the survey.
- Configure the password options by specifying the following:
- Password length
- Password expiration time, either daily or hourly
- Once you have finished configuring the above options, click “Save”.
The system provides the option to issue a password to the researcher for filling out the survey in cases where satellites cannot capture their current location due to geographical obstruction. This ensures that the survey is completed at its actual location by following these steps:
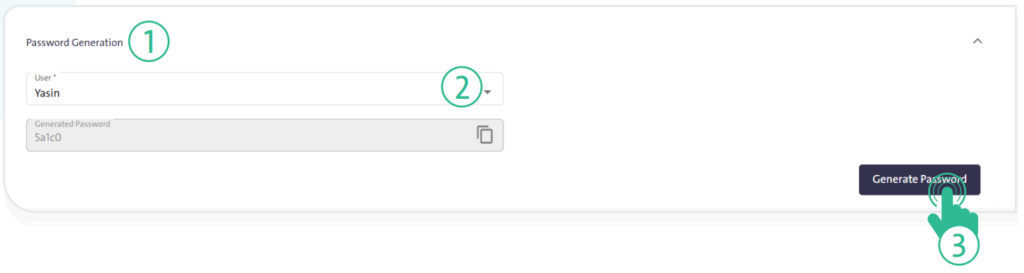
- Click the “Password Generation“ tab.
- Select the username.
- Click “Generate Password” to create a new password. This password is given by the supervisor to the field researcher and will expire within one hour or one day, depending on the previously selected option.
Fourth: Search Fields #
These are the questions selected for researchers to use when searching for specific units. To add these questions, follow these steps:
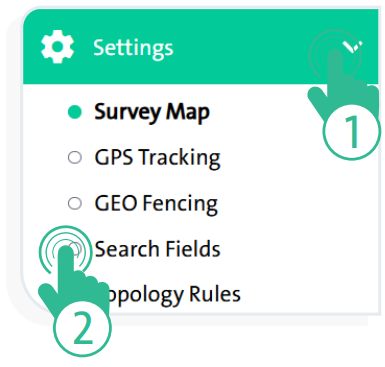
- From the side control menu, select “Settings” .
- Click “Search Fields” to display the search fields settings screen, as shown in the following figure.
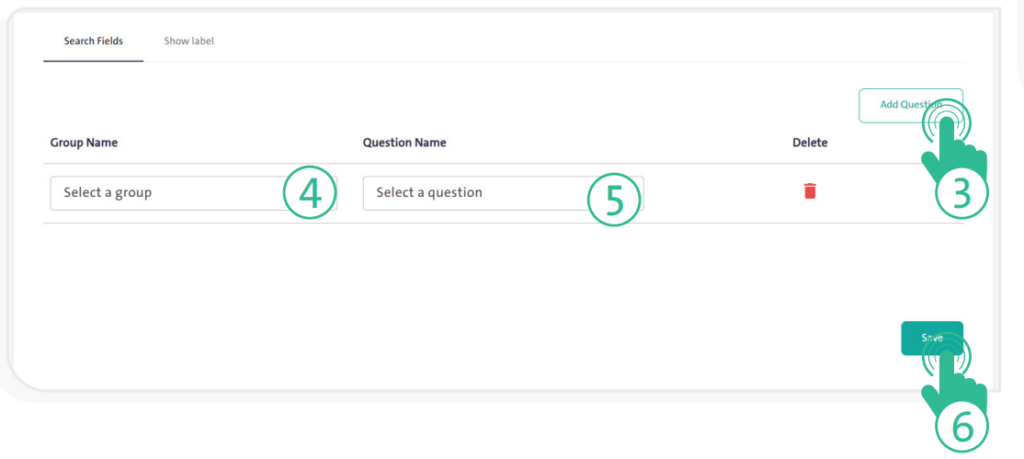
- Click “Add Question”
 .
. - Select the group name and the question name from the survey.
- Once you finish selecting the questions, click “Save”
 .
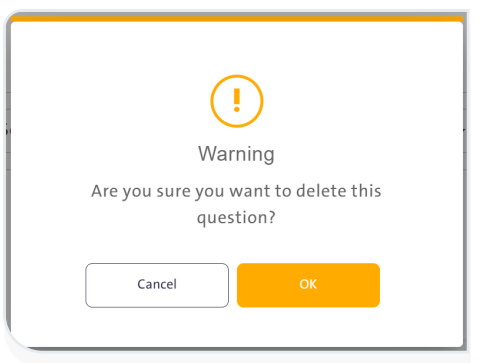
. - You can delete a question by clicking the “Delete” icon
 . A warning message will appear asking you to confirm the deletion, as shown in the following figure.
Fifth: Topographic Rules #
You can configure the topographic rules in map update surveys by following these steps:
- From the side control menu, select “Settings” .
- Click “Topology Rules” to display the topographic layers settings screen, as shown in the following figure.
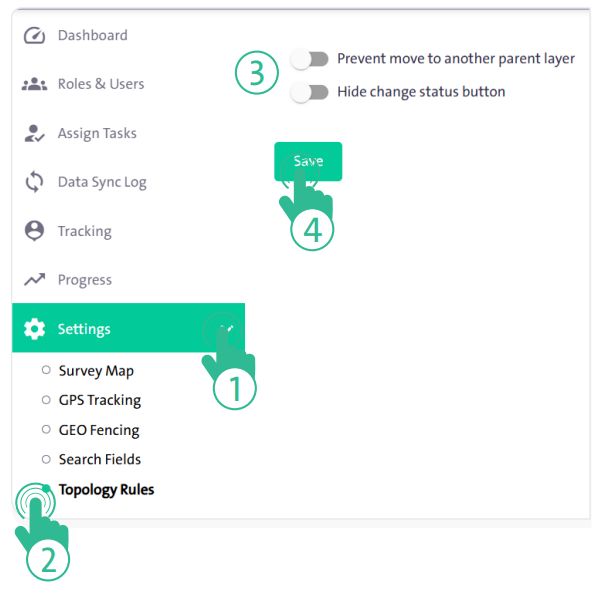
- Enable or disable the option “Prevent move to another parent layer“.
- Enable or disable the option “Hide change status button“.
- Once you have finished configuring the above options, click “Save” .