
View the progress and completed work of researchers in the field. #
The system enables the user to monitor the tasks assigned to researchers, evaluate their level of progress, and ensure that the required work is carried out efficiently.
To do this, follow these steps:
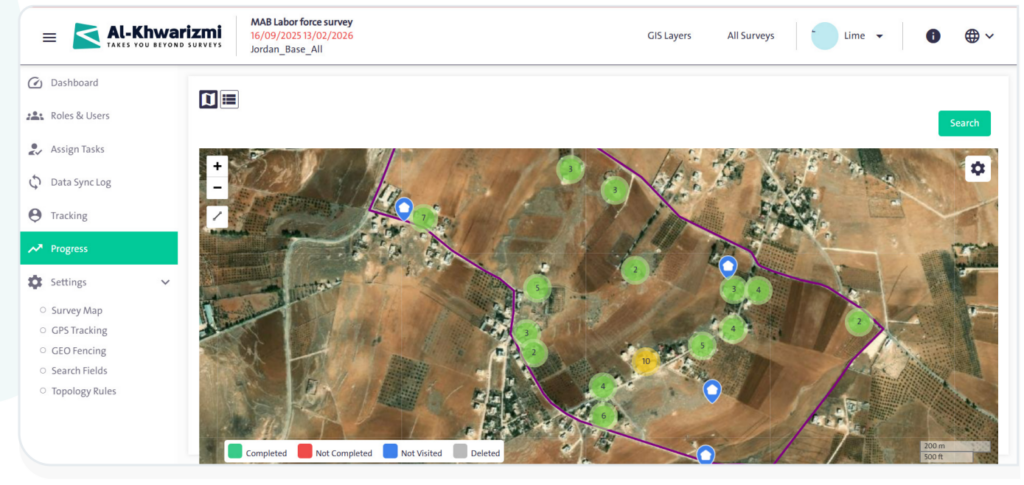
- Select “Progress”
 from the side control menu. A geographic map will appear with the following color codes:
- Green: Completed — indicates the units that the researcher has finished.
- Red: Not Complete — indicates the units that the researcher started filling out but has not yet completed.
- Blue: Not visited — indicates the units that the researcher has not yet visited.
- Gray: Deleted — indicates the units that have been deleted for any reason, which are still counted within the progress rate.

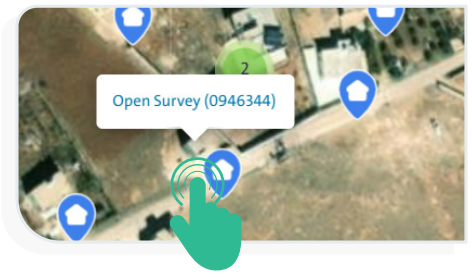
- Click the “Unit” icon
 on the map to display the “Open Survey” link for the selected unit, as shown in the following image:
INFO
- You can switch between Open Street Map and World Imagery maps by clicking the icon
 , then selecting the option that suits you.
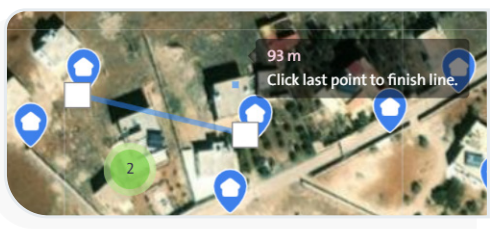
- You can measure distances on the map using the “Distance“ icon
 by drawing a start point and an endpoint for the path you want to measure. The result will appear as shown in the adjacent image.
- You can control the map view using the following options:
- Click the zoom-in icon
 to enlarge the map view.
 - Click the zoom-out icon
 to reduce the map view.
- Click the zoom-in icon
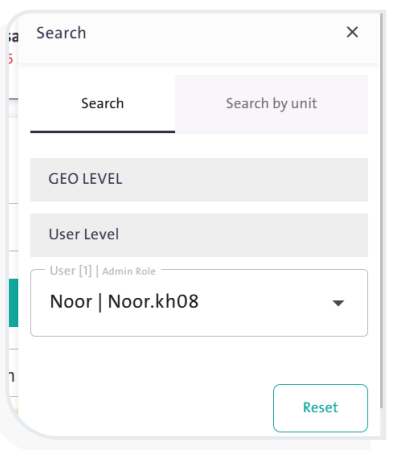
- You can search for a specific geographic layer to track progress by following these steps:
- Click “Search”
 .
. - Select the geographic level. You can specify the governorate, city, district, neighborhood, or street.
- Define the user level by selecting both the user and the sub-user.
- Click “Search”
- You can switch to the list view by clicking the “List” icon
 . A table will appear containing the following data:
- Username.
- Progress.
- Count of each of the following:
- Closed.
- Not visited.
- Incomplete.
- Completed.
- Deleted.
- Total.
- Added.
- Transferred.
- Details.
- View on map.

- You can search for a specific user in the progress table by typing their name in the search box
 .
. - You can view the survey details by clicking the “Open” link
 in the Details field corresponding to the user’s name, to display the survey details as shown in the following image:
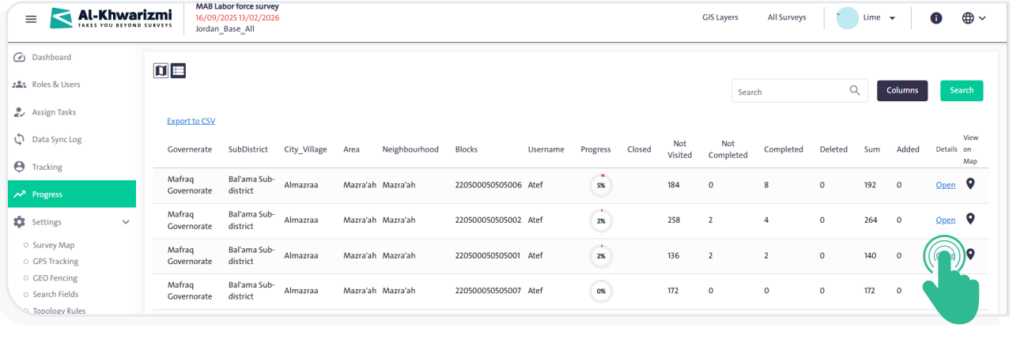
- You can export the progress table in CSV format by clicking the provided link
 , allowing you to handle its data outside the system.