Skip to content
  • Home
  • Documentation
  • Contact
  • About
Menu
  • Home
  • Documentation
  • Contact
  • About
العربية

Designer

34
  • Introduction to the Survey Designer
  • Start As Survey Designer
  • Frequently Asked Questions (FAQ)
  • Error Messages and Their Solutions
  • Designer Dashboard
    • Overview
    • Edit Profile Information
    • Log Out
    • Change Language
    • View Key Information of Al-Khwarizmi Platform
    • View Survey Summary
  • My Surveys Screen
    • Overview
    • Viewing Surveys
    • Creating a New Survey
    • Copy a Survey from Templates
    • Duplicate an Existing Survey
    • Edit an Existing Survey
    • Delete a Survey
    • Add a Survey to Templates
    • View Survey Versions
    • Survey Reports
    • Sort the Surveys Table
    • Search the Table Data
  • Control Panel
    • Overview
    • Add organization
    • Search for a User Role
    • Creating New Groups
    • Add Users to Groups
    • Search for Users
    • Add Users
    • Assign Surveys
    • Survey Timeline View
    • Enrich the Question Bank
    • Upload a Survey Sample
    • Enrich the Coding List

Call Center

27
  • About the Call Center
  • Getting Started with the Call Center
  • Frequently Asked Questions (FAQs)
  • Error Messages and Solutions
  • Call Center Dashboard
    • Overview
    • Edit Profile Information
    • Log Out
    • Change Language
    • Sending Notifications
    • View Key Information of Al-Khwarizmi Platform
    • Viewing Available Surveys
  • Form Screen
    • Overview
    • Displaying the Survey Main Screen
    • Adding a New Job Group
    • Add Users to Survey Roles
    • Preview Users and Their Job Group
    • Add a New Queue
    • Add a New Queue
    • Assign Queues
    • Distribute Workload in Queues
    • Pull a survey Unit
    • View Task Log
    • Filter the Task Table
    • Task Table Column Settings
    • Assign Units from Queue
    • Search for a Unit
    • Add a Call

Field Managment

29
  • Introduction to Field Management
  • Getting Started as a Field Management
  • Frequently Asked Questions (FAQ)
  • Error Messages and Solutions
  • Field Managment Dashboard
    • Overview
    • Edit Personal Account Information
    • Change Password
    • Logout
    • View Al-Khwarizmi Platform Information
    • Change Language
    • View Available Surveys
    • Create New Map Update Survey
    • Preview of Geographic Maps
    • Add a New Map
  • Form Screen
    • Overview
    • Display the survey Main Screen
    • Create a New Workgroup
    • Add Users to the Survey Job Group
    • Assign Tasks Using Maps
    • Assigning Tasks Using the List
    • Assigning Units to Users
    • Viewing the Data Transfer Log
    • Configuring Data Sync Log Table Columns
    • Tracking
    • Field Researchers’ Progress
    • Table Column Settings for the Progress Report
    • Configure Survey Settings
    • Configure Survey Settings
    • Add a New Version of Geographic Layers
View Categories
  • Home
  • Docs
  • Field Managment
  • Form Screen
  • Add a New Version of Geographic Layers

Add a New Version of Geographic Layers

Create an updated version of the geographic layers used by the team. #

To complete this task, follow the steps below:

Step 1: Add a Version #

  • Click the “GIS Layers” link at the top of the screen, then select the “Versions Settings” tab.
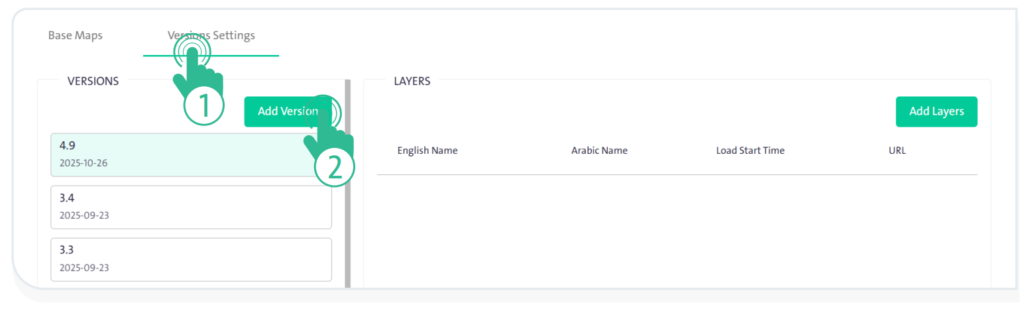
  • Click “Add Version” to display the corresponding window.
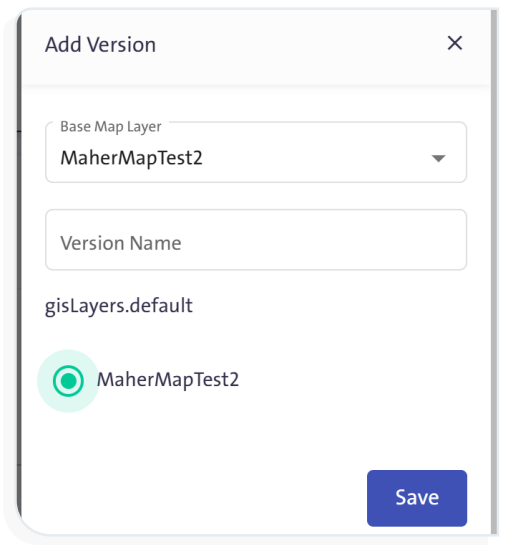
  • Add the following geographic layer details:
    • Select the “Base Map Layer”.
    • Enter the “Version Name”.
    • Save the version by clicking “Save”.
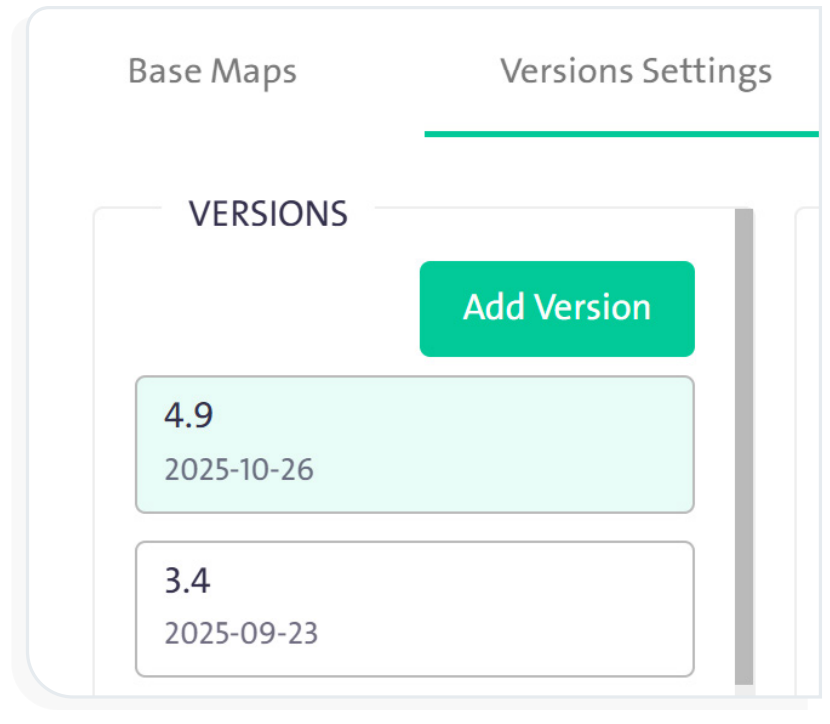
  • The version will appear in the list of available versions, as shown in the figure below.
Step 2: Add Layers #

To add new geographic layers to the version created in the previous step, follow these steps:
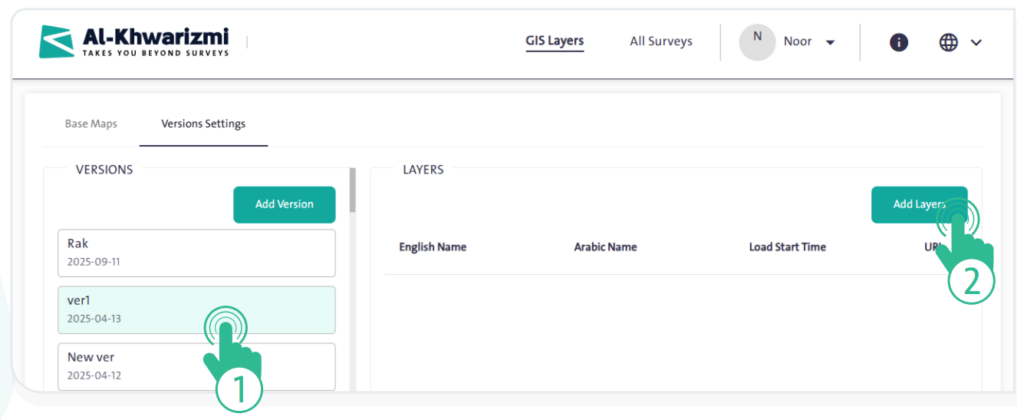
  • Select the version name from the “Versions” list.
  • Click “Add Layers” to display the corresponding window.
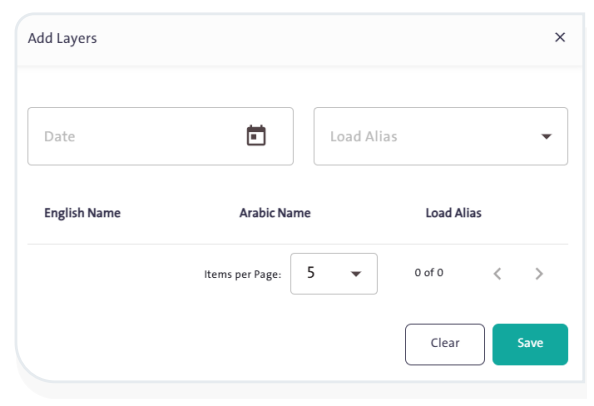
  • Enter the following details for the new layer:

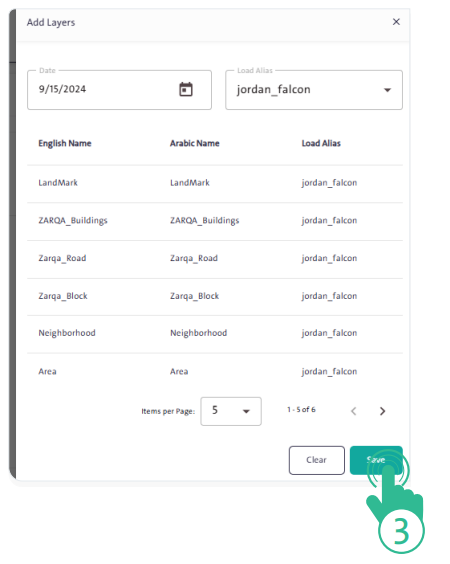
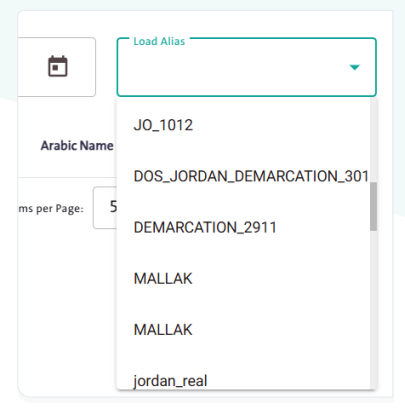
– From the “Load Alias” dropdown list, select the layer you want to add to the version.

– A table will appear showing the available layer data, as illustrated in the figure below.
– Click “Save” at the bottom of the side window.

– A table will appear, as shown in the figure below, containing the layers you selected in the previous step, and including the following data:
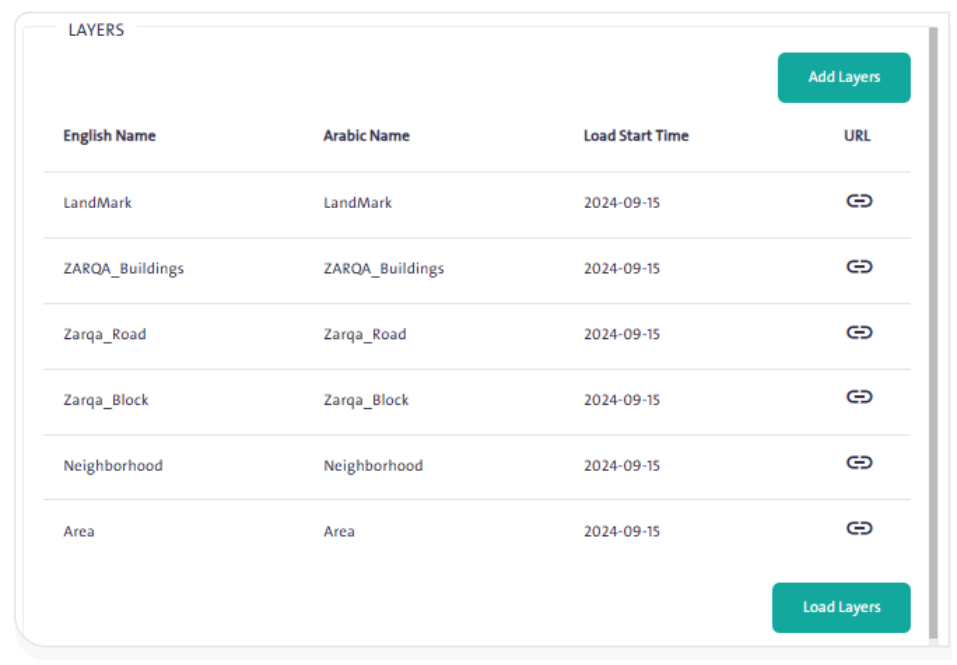
  • “ English Name”
  • “ Arabic Name”
  • “Load Start Time”
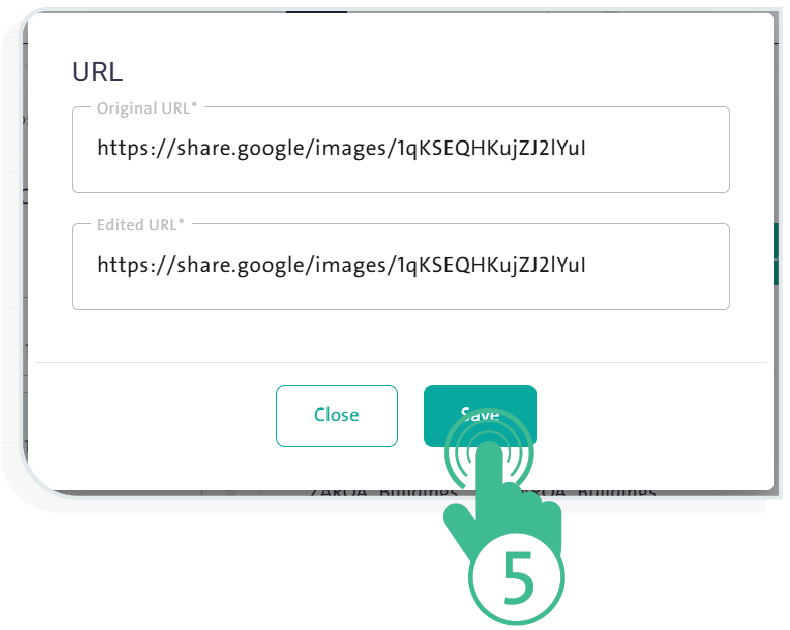
  • “Map URL”: Use this icon to edit the old link and replace it with a new one to update the version. To do this, follow these steps:

– Click the “Link” icon in the URL field to display the following screen:
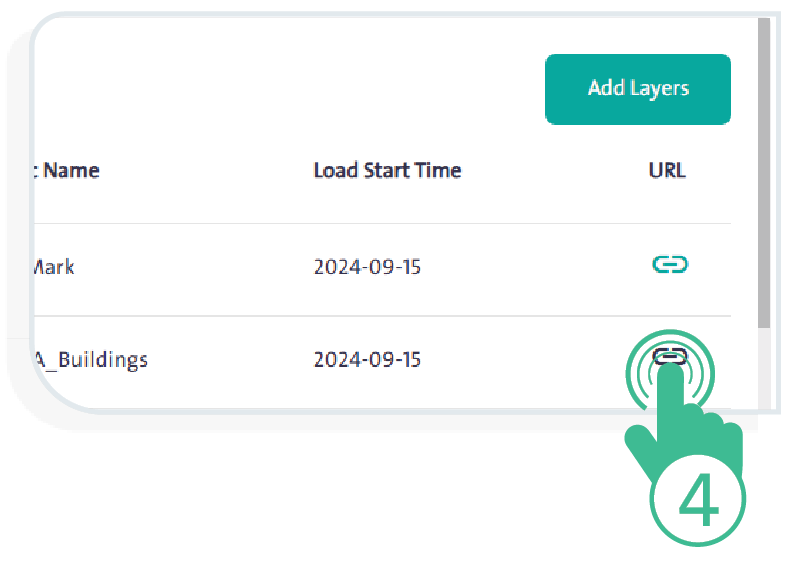
– Paste the new link in the “Original URL” box and repeat the entry in the “Edited URL” box, then click “Save” to upload the map image for the new version.
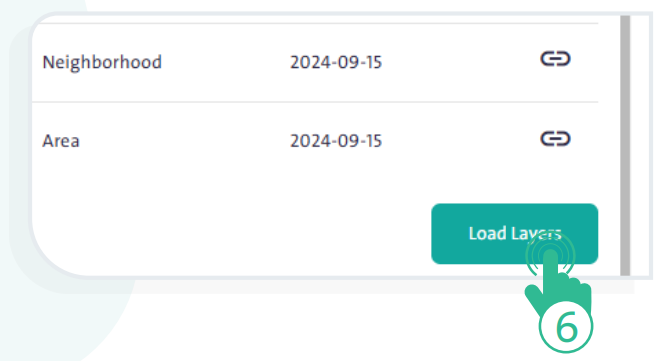
  • Click “Load Layers” at the bottom of the previous layers table to include the new maps in the version you added earlier.

What are your Feelings

  • Happy
  • Normal
  • Sad
Configure Survey Settings
Table of Contents
  • Create an updated version of the geographic layers used by the team.
    • Step 1: Add a Version
    • Step 2: Add Layers

More Links

  • Abbreviations
  • Dictionary
  • Conventions
  • Al Khwarizmi Products
  • Al Khwarizmi Designer

Al Khwarizmi User Guide by Realsoft. All Rights Reserved.