Skip to content
  • Home
  • Documentation
  • Contact
  • About
Menu
  • Home
  • Documentation
  • Contact
  • About
العربية

Designer

34
  • Introduction to the Survey Designer
  • Start As Survey Designer
  • Frequently Asked Questions (FAQ)
  • Error Messages and Their Solutions
  • Designer Dashboard
    • Overview
    • Edit Profile Information
    • Log Out
    • Change Language
    • View Key Information of Al-Khwarizmi Platform
    • View Survey Summary
  • My Surveys Screen
    • Overview
    • Viewing Surveys
    • Creating a New Survey
    • Copy a Survey from Templates
    • Duplicate an Existing Survey
    • Edit an Existing Survey
    • Delete a Survey
    • Add a Survey to Templates
    • View Survey Versions
    • Survey Reports
    • Sort the Surveys Table
    • Search the Table Data
  • Control Panel
    • Overview
    • Add organization
    • Search for a User Role
    • Creating New Groups
    • Add Users to Groups
    • Search for Users
    • Add Users
    • Assign Surveys
    • Survey Timeline View
    • Enrich the Question Bank
    • Upload a Survey Sample
    • Enrich the Coding List

Call Center

27
  • About the Call Center
  • Getting Started with the Call Center
  • Frequently Asked Questions (FAQs)
  • Error Messages and Solutions
  • Call Center Dashboard
    • Overview
    • Edit Profile Information
    • Log Out
    • Change Language
    • Sending Notifications
    • View Key Information of Al-Khwarizmi Platform
    • Viewing Available Surveys
  • Form Screen
    • Overview
    • Displaying the Survey Main Screen
    • Adding a New Job Group
    • Add Users to Survey Roles
    • Preview Users and Their Job Group
    • Add a New Queue
    • Add a New Queue
    • Assign Queues
    • Distribute Workload in Queues
    • Pull a survey Unit
    • View Task Log
    • Filter the Task Table
    • Task Table Column Settings
    • Assign Units from Queue
    • Search for a Unit
    • Add a Call

Field Managment

29
  • Introduction to Field Management
  • Getting Started as a Field Management
  • Frequently Asked Questions (FAQ)
  • Error Messages and Solutions
  • Field Managment Dashboard
    • Overview
    • Edit Personal Account Information
    • Change Password
    • Logout
    • View Al-Khwarizmi Platform Information
    • Change Language
    • View Available Surveys
    • Create New Map Update Survey
    • Preview of Geographic Maps
    • Add a New Map
  • Form Screen
    • Overview
    • Display the survey Main Screen
    • Create a New Workgroup
    • Add Users to the Survey Job Group
    • Assign Tasks Using Maps
    • Assigning Tasks Using the List
    • Assigning Units to Users
    • Viewing the Data Transfer Log
    • Configuring Data Sync Log Table Columns
    • Tracking
    • Field Researchers’ Progress
    • Table Column Settings for the Progress Report
    • Configure Survey Settings
    • Configure Survey Settings
    • Add a New Version of Geographic Layers
View Categories
  • Home
  • Docs
  • Field Managment
  • Form Screen
  • Add Users to the Survey Job Group

Add Users to the Survey Job Group

Add the users who will be assigned tasks in the survey. #

The “Roles and Users” screen allows you to set up the team members who will carry out the tasks of monitoring and filling in the survey in the field. Users can be added and assigned roles through one of the following methods:

Method 1: Add a User Manually #

In this method, users are added manually to the Field Management System by following these steps:

  • Select “Roles and Users” from the side control menu to display the screen, then choose the “Users” tab, as shown in the figure below.
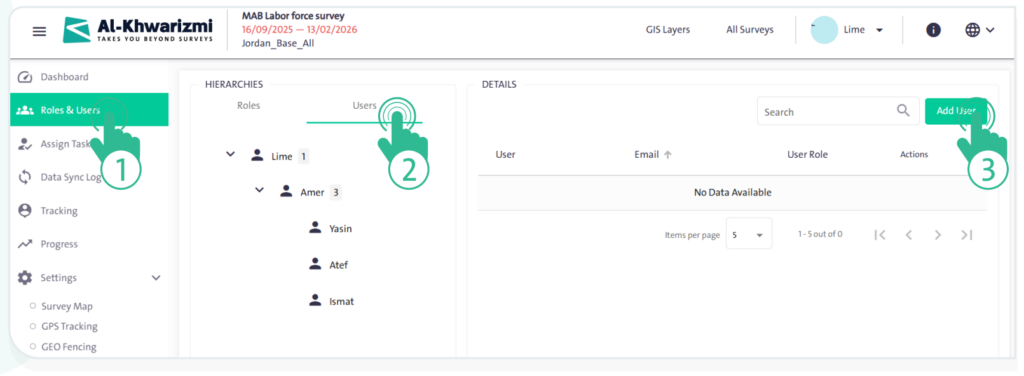
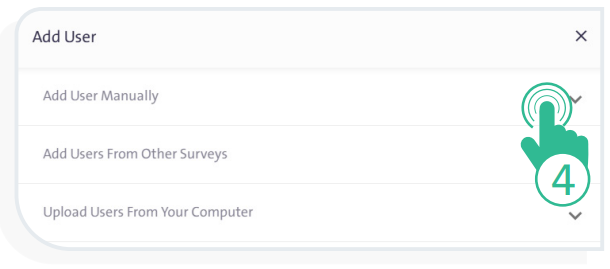
  • Click “Add User” to open a pop-up window, then select “Add User Manually”.
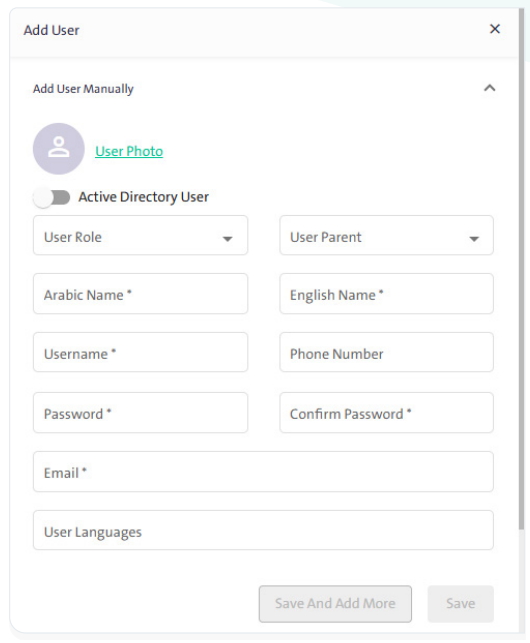
  • Enter the following details for the new user:
    • “ Arabic Name “
    • “ English Name “
    • “Username”
    • “Phone Number”
    • “Email”
    • “User Language”
    • “User Parent”
    • “User Role”
    • “Password”
    • “Confirm Password”
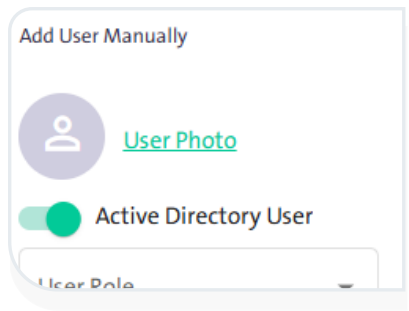
  • Click the “User Photo” link to upload the user’s photo from your device.
  • Once you have completed entering the above details, click “Save” to add the user.

  • To continue adding more users, click “Save and Add More” .

  • To cancel adding the user, click “Cancel” .
INFO
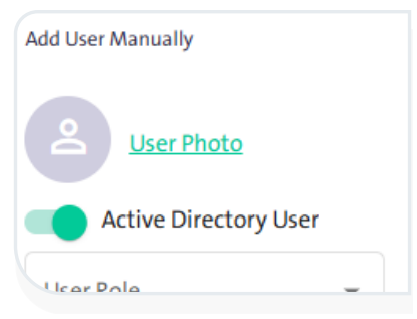
  • If you enable “Active Directory User”, the system will skip the request for:
    • “Password”
    • “Confirm Password”

Method 2: Import Users from Other Surveys #

The system allows you to add users to the current survey who were previously entered in another survey, saving you significant time. To do this, follow these steps:

  • Select “Roles and Users” from the side control menu to display the following screen:
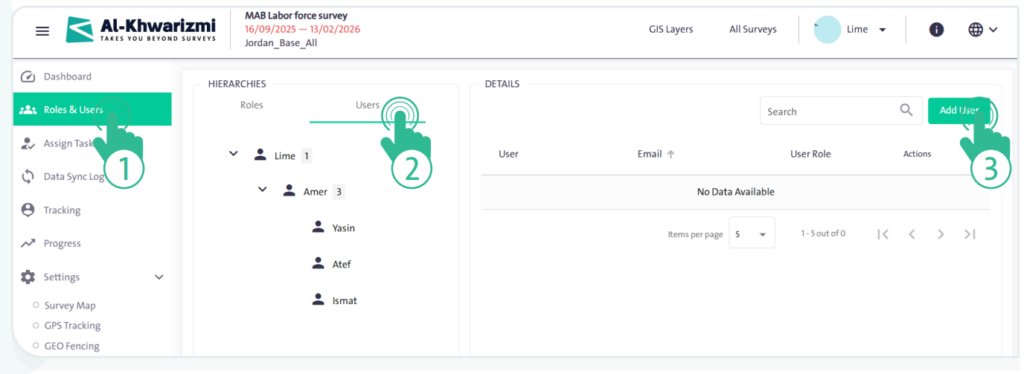
  • Click “Add User” to open a pop-up window.
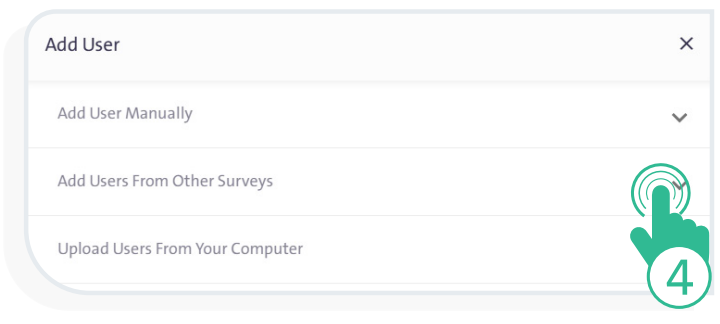
  • select “Add Users from Other Surveys”, and enter the following user details:
    • Select the user from the available users list.
    • Choose the user parent.
    • Choose the user role.
  • Once you have finished entering the above details, click “Save” to add the user.
  • To cancel adding the user, click “Cancel” .

Method 3: Upload Users from Your Device #

The system supports uploading a batch of users easily, saving time and effort instead of entering them manually. This method relies on uploading a file containing the employees’ names and details into the system. To do this, follow these steps:

  • Select “Roles and Users” from the side control menu to display the following screen:
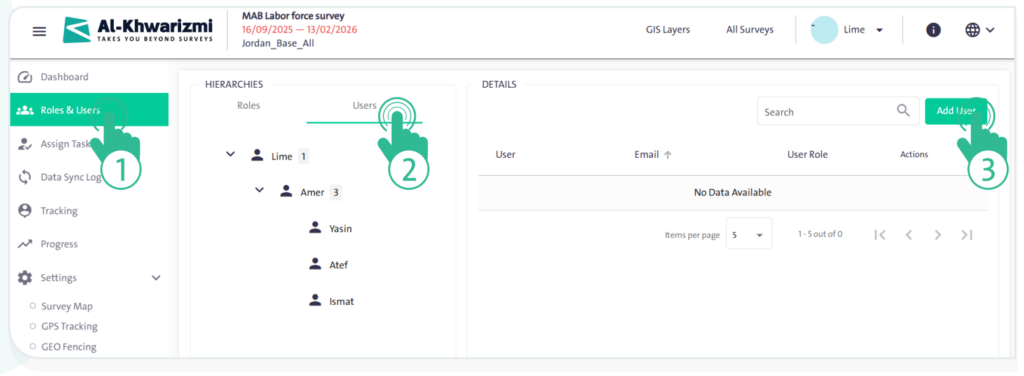
  • Click “Add User” to open a pop-up window.
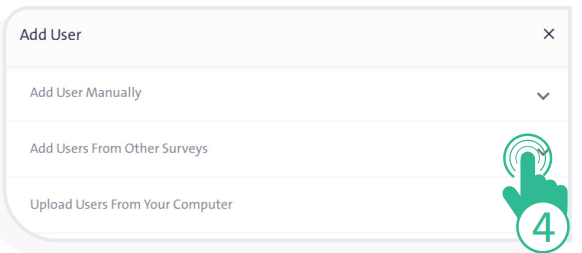
  • Select “Upload Users from Your computer”, and follow these steps:
    • Select user parent.
    • Choose user role
    • Download the Excel template from the system to your device and fill in the user details, which include:
      • “Name in Arabic”
      • “Name in English”
      • “Email”
      • “Username”
      • “Password” (if this field is left blank, the system will automatically generate a password for the user)
    • Upload the completed template from your device into the system.
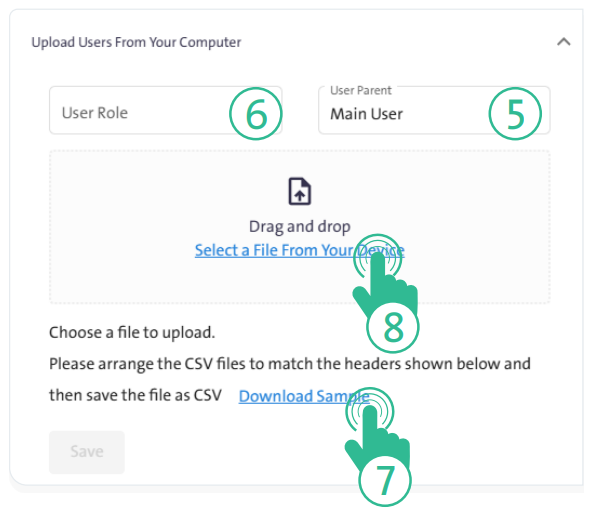
  • Once you have finished entering the above details, click “Save” to add the user.
  • To cancel adding the user, click “Cancel” .
INFO

You must edit the CSV file while keeping the same column names, then save the file in CSV format before uploading it.

What are your Feelings

  • Happy
  • Normal
  • Sad
Assign Tasks Using MapsCreate a New Workgroup
Table of Contents
  • Add the users who will be assigned tasks in the survey.
    • Method 1: Add a User Manually
    • Method 2: Import Users from Other Surveys
    • Method 3: Upload Users from Your Device

More Links

  • Abbreviations
  • Dictionary
  • Conventions
  • Al Khwarizmi Products
  • Al Khwarizmi Designer

Al Khwarizmi User Guide by Realsoft. All Rights Reserved.