
Add the users who will be assigned roles in the survey. #
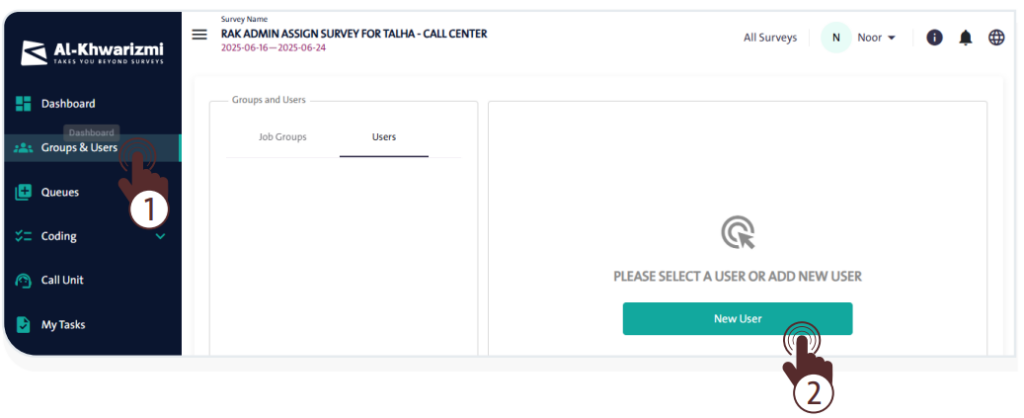
The “Group and Users” screen allows you to form the team members who will carry out the tasks of reviewing, monitoring, and validating the form. Users can be added and assigned roles using one of the following methods:
Method 1: Add a User Manually #
In this method, users are added manually to the Call Center system by following these steps:
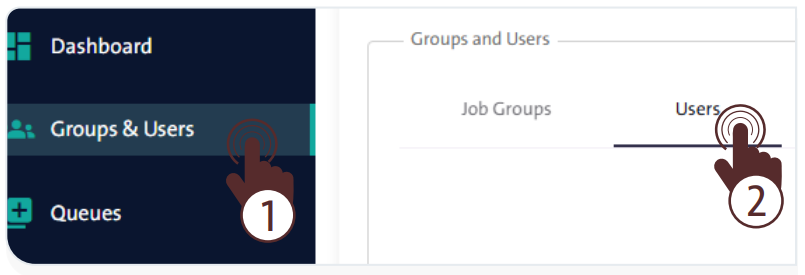
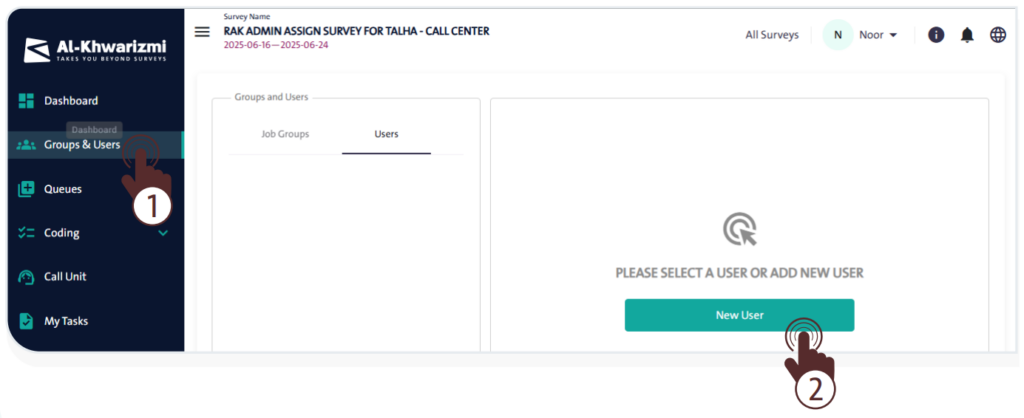
- From the side control menu, select “Group and Users”

- Click “Users” under the Groups & Users section.
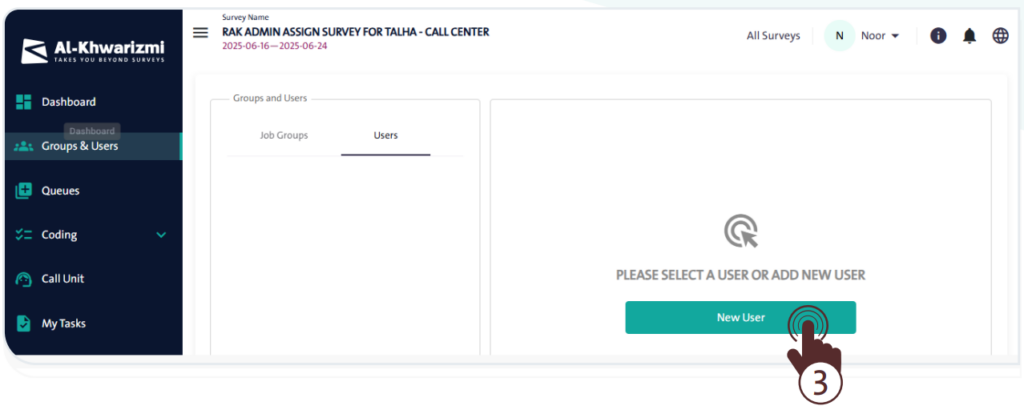
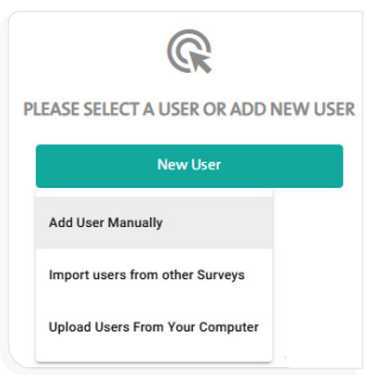
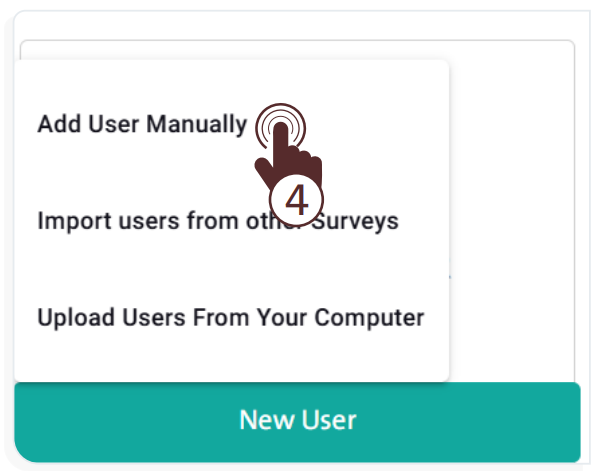
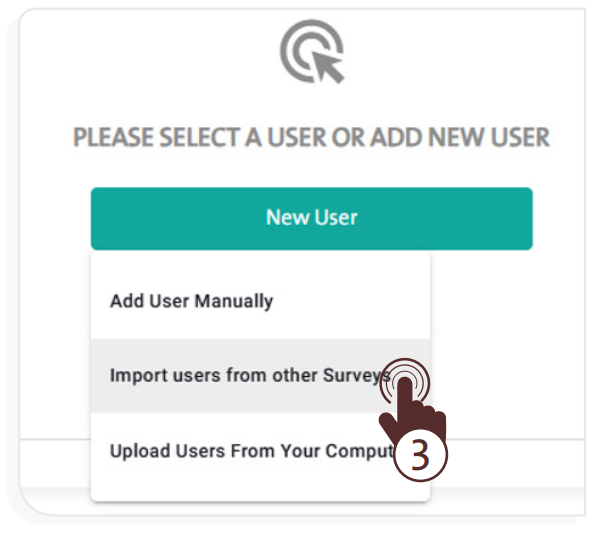
- Click “New User”
 a dropdown list; choose “Add User Manually” then enter the following information:
- Arabic Name
- English Name
- Username
- Phone Number
- Email Address
- User Language
- User Parent
- Add User to Group
- Password
- Confirm Password
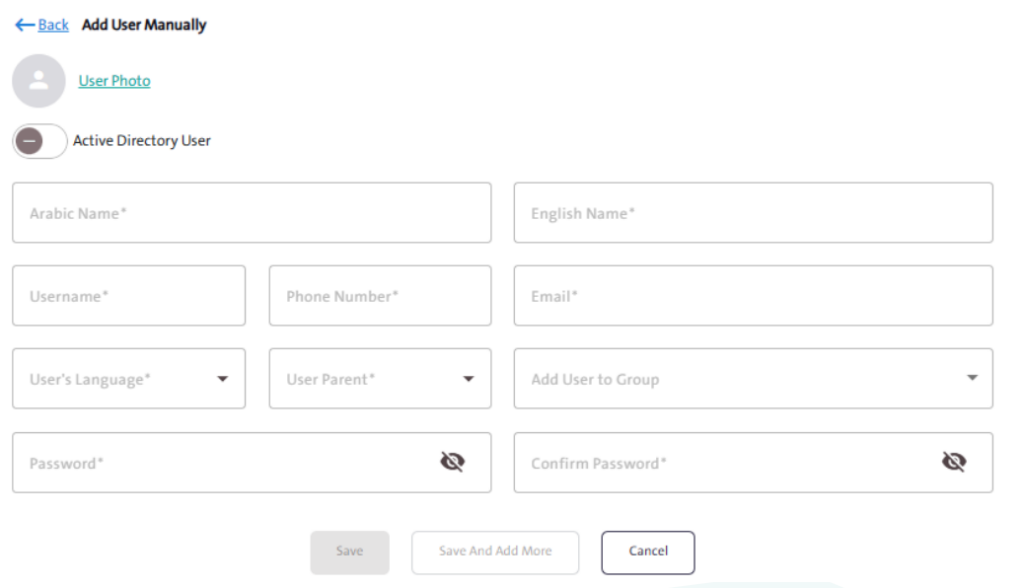
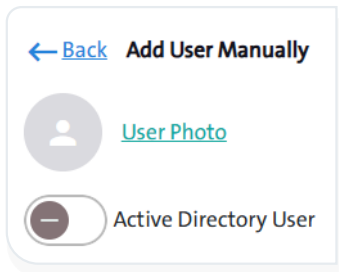
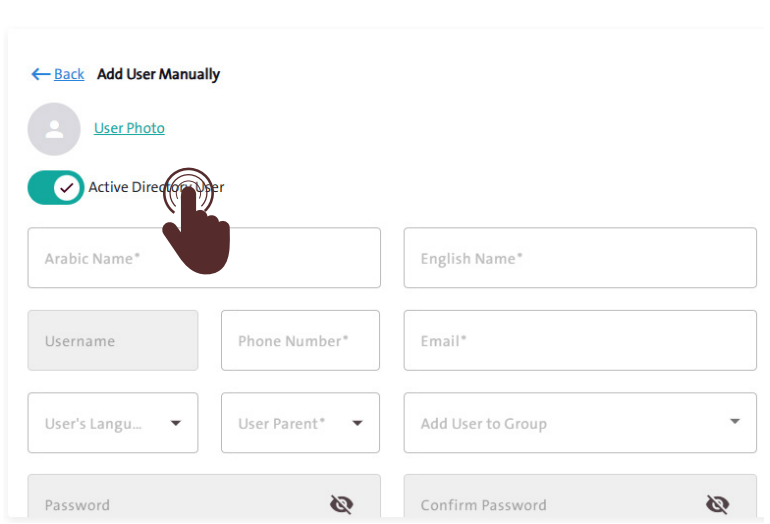
- Click the “User Photo” link to upload the user’s photo from your device.
- Once all the required information is entered, click “Save”
 to add the user.
 - To continue adding more users, click “Save and Add More”
 .
. - To cancel adding a user, click “Cancel”
 at the top of the Add User screen.
- If you enable “Active Directory User,” the system will skip the requirement for:
- Password
- Confirm Password
- Email Address
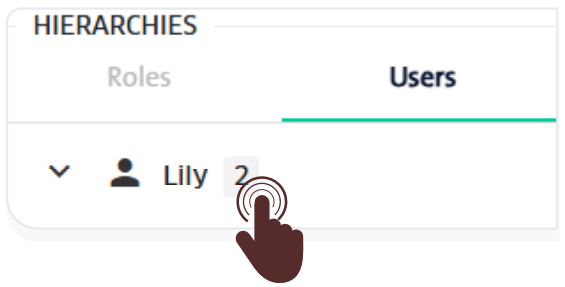
- Click the arrow next to the username to display a list of the users associated with it.
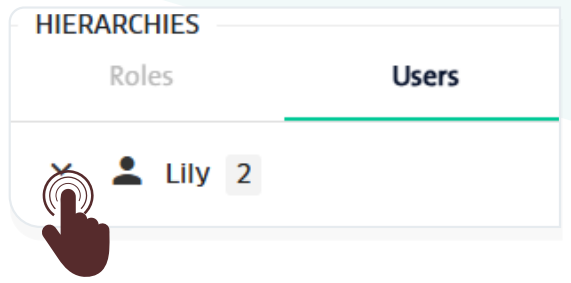
- The number shown next to the username indicates how many users are linked to the primary user.
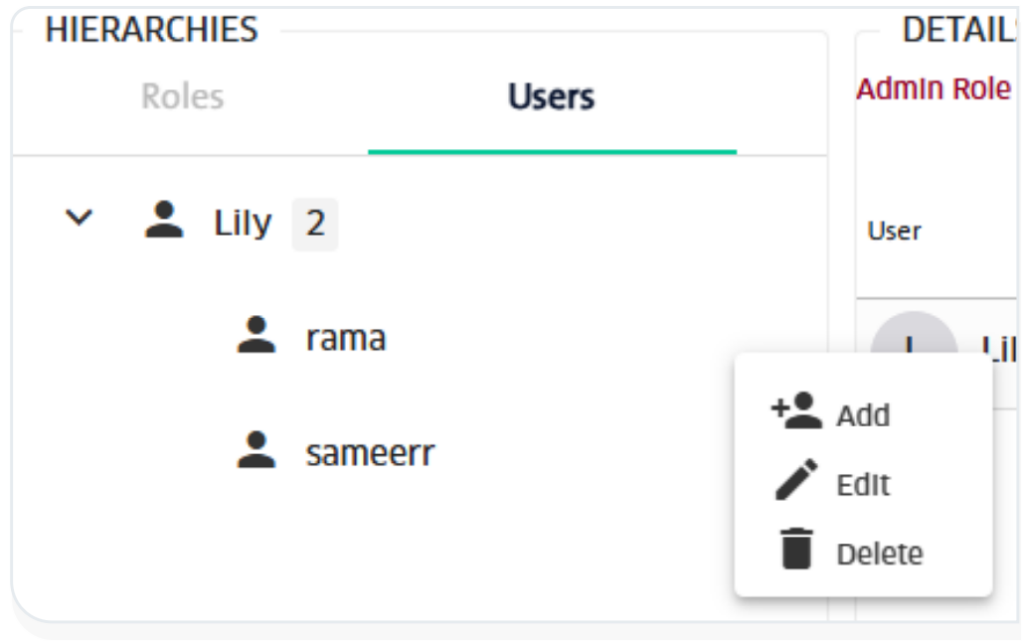
- Click the “More” icon to perform the following actions:
- Add a Sub-User
- Edit User
- Delete User
- The expansion of the user hierarchy varies depending on the survey team members.
Method 2: Import Users from Other Surveys #
The system allows you to add users to the current form who were previously entered in another form, saving you considerable time. To do this, follow these steps:
- From the side control menu, select “Groups and Users” .
- Click “New User” a dropdown list; choose “Import Users from Other Surveys” then enter the following user information:
- From the list, select one or more users you want to import.
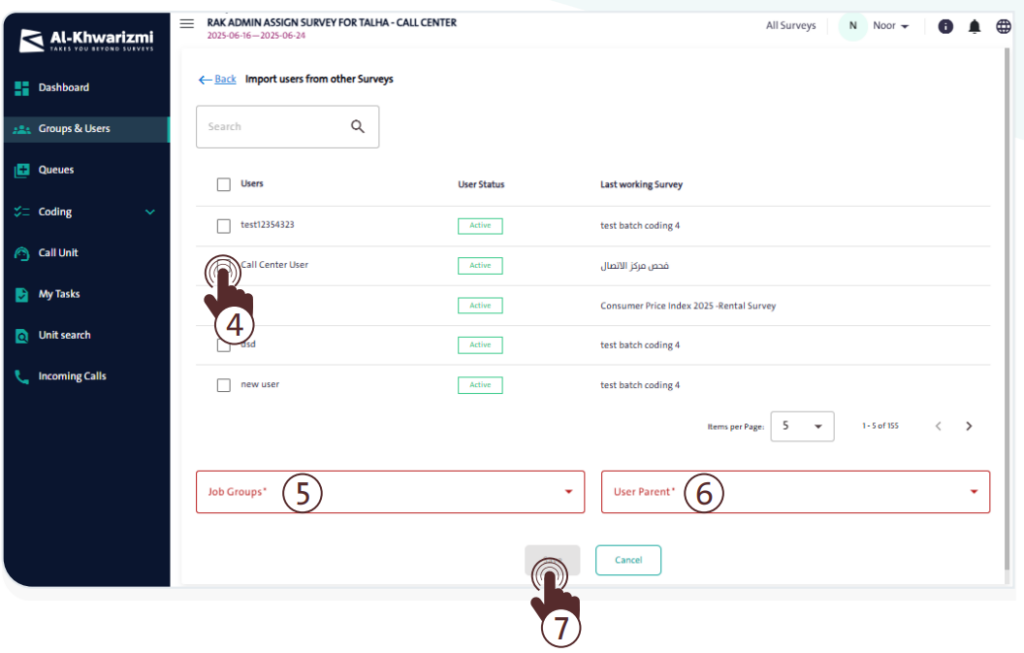
- Choose the appropriate “Job Group” and “User Parent” from the dropdown menus at the bottom of the screen.
- After completing the selections, click “Save” to import the selected users into the current survey.
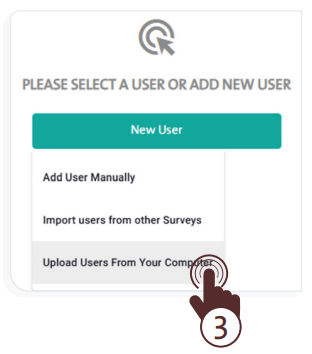
Method 3: Upload Users from Your Computer #
The system supports uploading a batch of users with ease, saving time and effort compared to manual entry. This method relies on uploading a file that contains the employees’ names and details into the system. To do this, follow these steps:
- From the side control menu, select “Groups and Users” .
- Click “New User” a dropdown list; choose“Upload Users from Your Computer” then follow these steps:
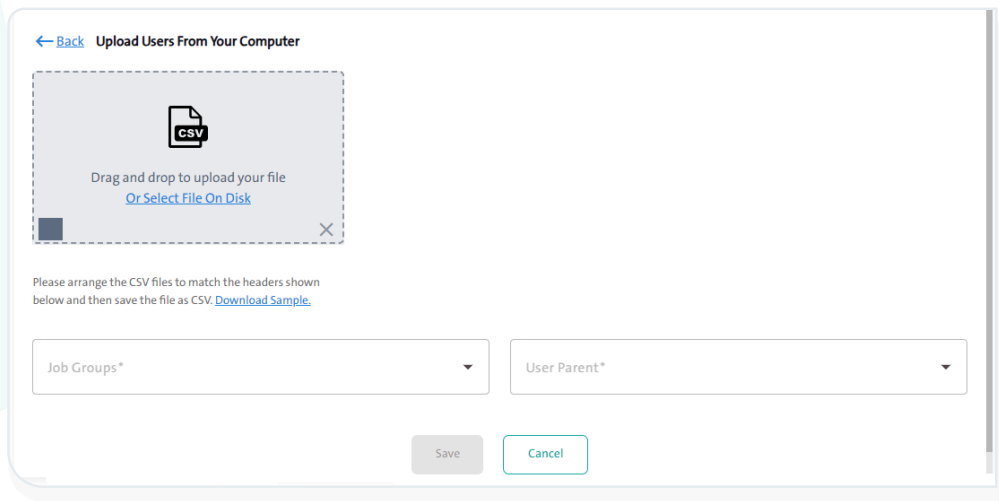
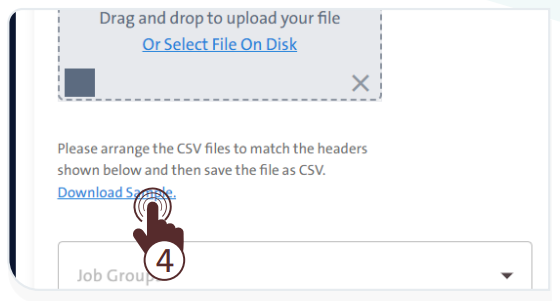
- Prepare your user data file in CSV format, ensuring that the column headers match the required structure.
- Click “Download Sample” to get a ready-made template and fill in the required user information, which includes:
- Name in Arabic
- Name in English
- Email Address
- Username
- Password (if left blank, the system will automatically generate a password for the user)
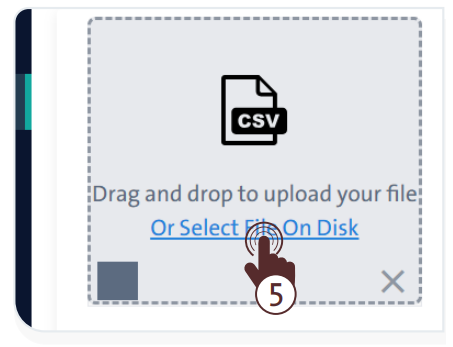
- Drag and drop the prepared CSV file into the upload area or click “Select File on Disk” to choose it manually from your device.
- Select the appropriate “Job Group” and “User Parent” from the dropdown lists shown at the bottom of the screen.
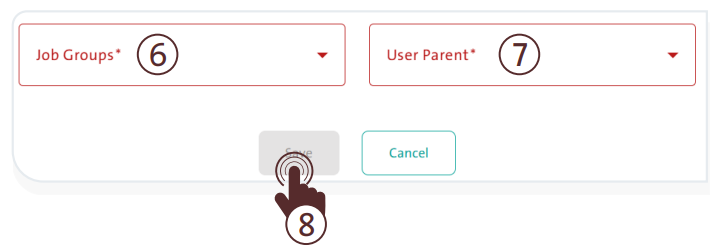
- Once all fields are completed, click “Save” to upload the users to the system.
- To cancel adding a user, click “Cancel” .
You must edit the CSV file while keeping the same column names, then save the file in CSV format before uploading it.