
Creating a New Survey
To create a new survey, follow these steps:
- Navigate to the “Dashboard”.
- Click “New Survey”.
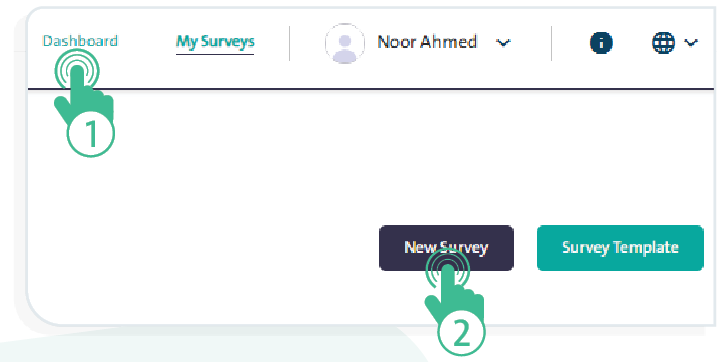
- A set of tabs will appear as a wizard to guide you through creating a new survey, as shown in the following image:

The following is a description of the function of each tab in the survey creation wizard:
First: “Configuration” Tab: #
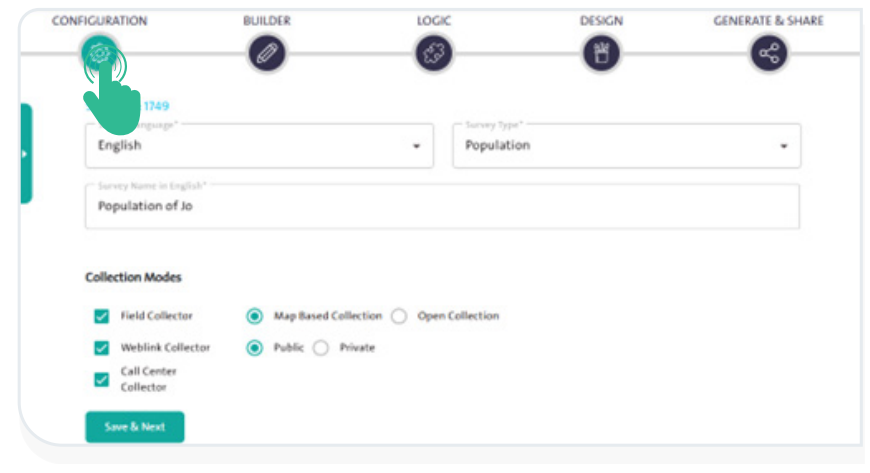
This tab is used to define the basic survey information, including:
- Survey Language
- Survey Type
- Survey Name in both Arabic and English.
- Collection Modes, such as:
- Field Collector: data collected by field enumerators through one of the following modes:
- Map-Based Collection – data collected using assigned map areas.
- Open Collection – data collected without map assignments.
- Weblink Collector: data collected through an online link, which can be Public or Private.
- Call Center Collector
- Field Collector: data collected by field enumerators through one of the following modes:
- Click “Save & Next”
 to proceed to the next step.
The data collection methods are categorized as follows:
- Weblink-Collector: Data is collected by sending an online link to respondents, and it is divided into two types:
- Public Weblink-Collector: The link is publicly accessible and can be shared with respondents via email or social media platforms.
- Private Weblink-Collector: If the survey targets specific respondents and is not public, the self-collection link will be private and will require the respondent to log in to access the survey.
- Call Center Collector:
The Call Center source is one of the data collection modes in the system. It allows managing and ensuring the quality of data as a complement to fieldwork. Through the Call Center, surveys that were previously filled out can be completed, verified, and reviewed if they are incomplete or require validation. Additionally, the Call Center can be used to carry out the entire data collection process without the need for field visits.
- Field Collection: Data is collected by providing the field staff with a dedicated survey link along with a personal account that includes a username and password. This method is divided into two types:
- Map Based Collection: Data is collected from respondents within predefined geographic locations that are linked to the survey sample.
- Open Collection: Data is collected from respondents within a predefined list. In this case, geographic locations or maps are not used to reach the samples.
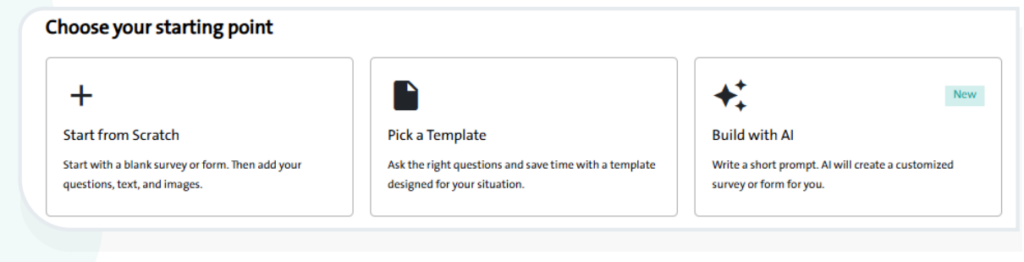
When creating a new survey, you can choose how to start:
- Start from Scratch: create a new blank survey or form manually.
- Pick a Template: use a ready-made template to save time and effort.
- Build with AI: generate a customized survey automatically by writing a short prompt.
Second: “Builder” Tab: #
This tab allows you to build the survey content and fields, where you can add the following:
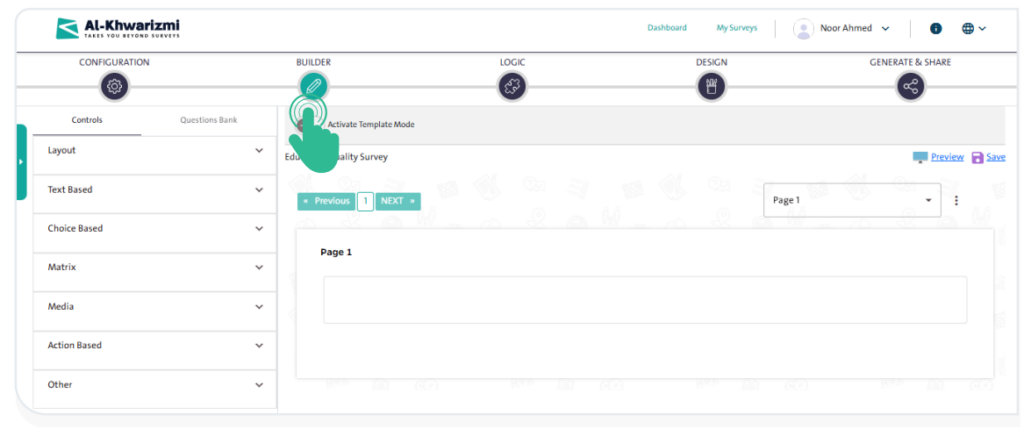
- Layout, which includes:
- Tab
- Tab Group
- Accordion.
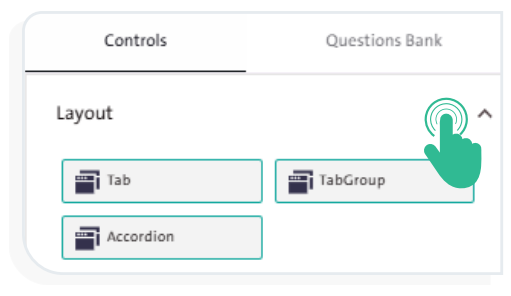
- Texts Based, which include:
- Text Field
- Text Area
- URL
- Number
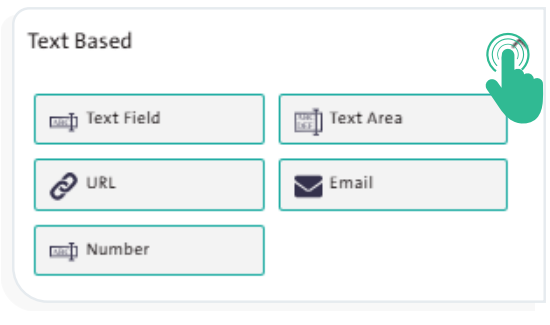
- Choice Based, which includes:
- Scale
- Checkbox
- Checkbox List
- Emojis Question
- Radio Button
- Rank
- Cascading Dropdown
- Star Rating
- Calendar
- Dropdown List
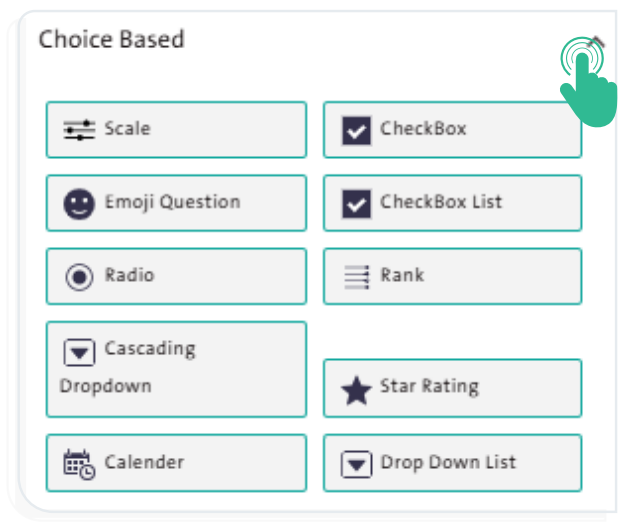
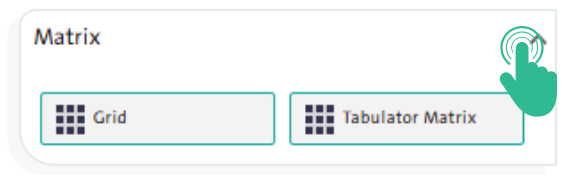
- Matrix, which includes:
- Grid
- Tabulator Matrix.
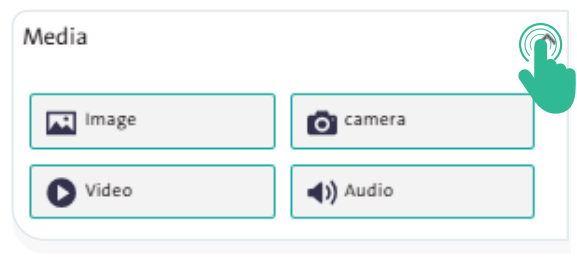
- Media, which include:
- Image
- Camera
- Video
- Audio
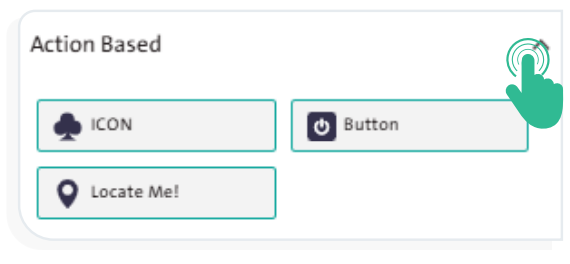
- Functional Controls, which include:
- Icon
- Button
- Locate Me!
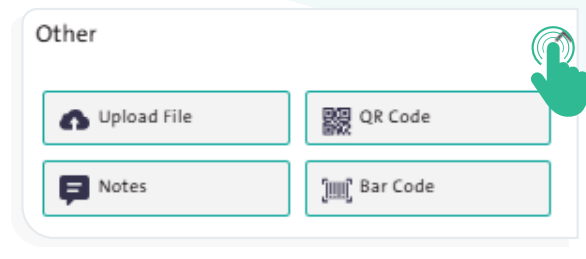
- Others:
- Upload File
- QR Code
- Notes
- Barcode
- All the above controls share a common editing menu, which includes:
- (
 ) Remove Control
 - (
 ) Move the control within the page to arrange the survey questions.
 - (
 ) Add the control, after editing, to the Question Bank.
 - (
 ) Edit control properties.
 - (
 ) Duplicate the control within the page.
 - (
 ) Add a rule to the control.
- (
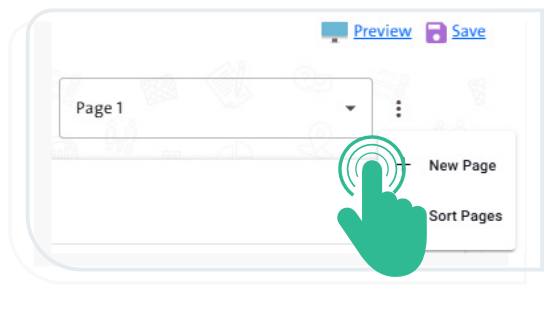
- You can add multiple pages to the survey by clicking “More”
 next to the page name , then selecting “New Page”
  from the popup menu.
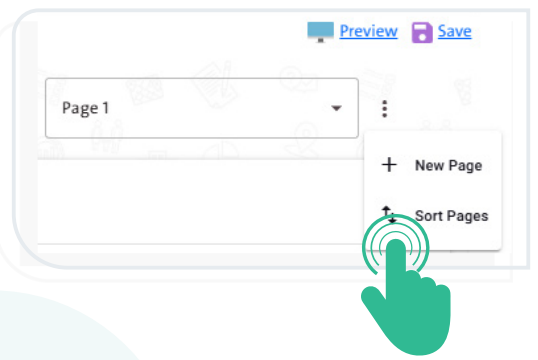
- You can reorder survey pages after adding multiple pages by clicking “More” next to the page name , then selecting “Sort Pages”
 from the popup menu.
- You can preview the survey while building it by clicking the “Preview” icon
 , which will display the survey preview page as it will appear upon actual publication.
Third: “Logic” Tab: #
This tab is used to add rules to the survey pages or the controls you created in the previous “Build” tab, to validate the survey questions you have added. Rules are divided into two types:
- Simple Rules consist of a single condition that triggers a single action.
- Compound Rules consist of multiple conditions that trigger multiple actions.
1- Rules: #
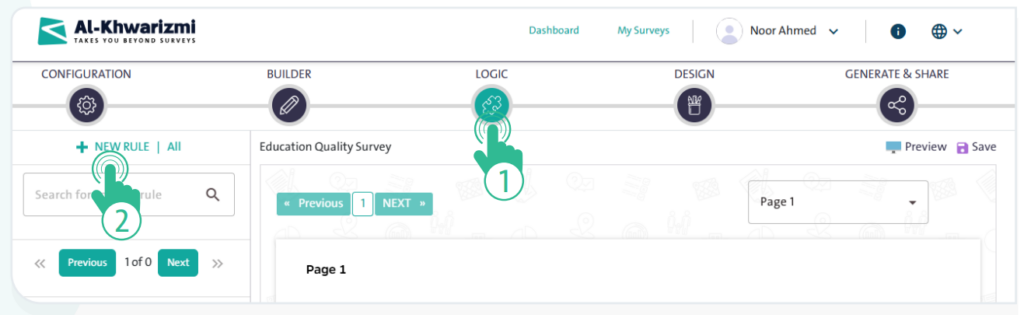
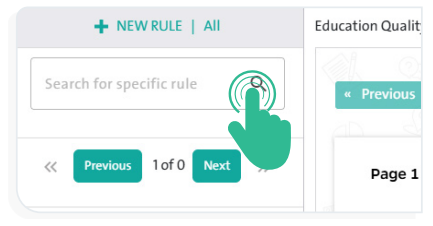
- To search for a rule, use the “Search Rule” field.
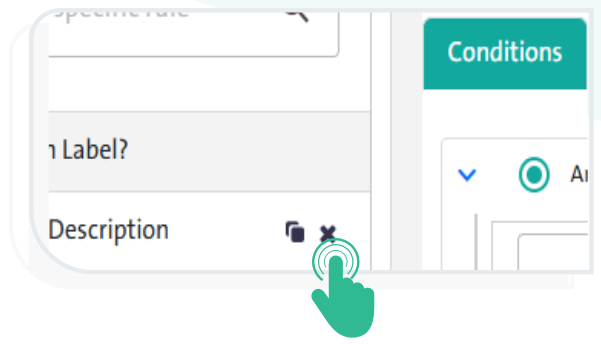
- To delete a rule you previously created, click the “Delete Rule” icon
 .
.
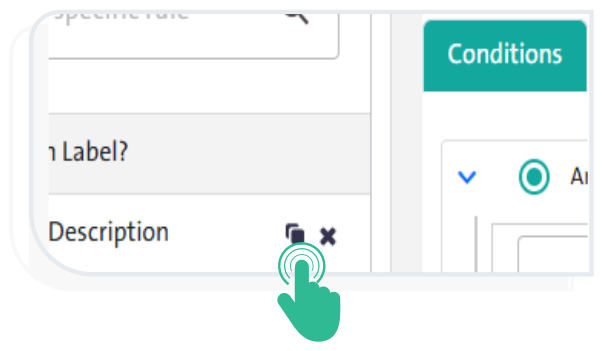
- To copy a rule, click “Rule Duplication” and the following window will appear:
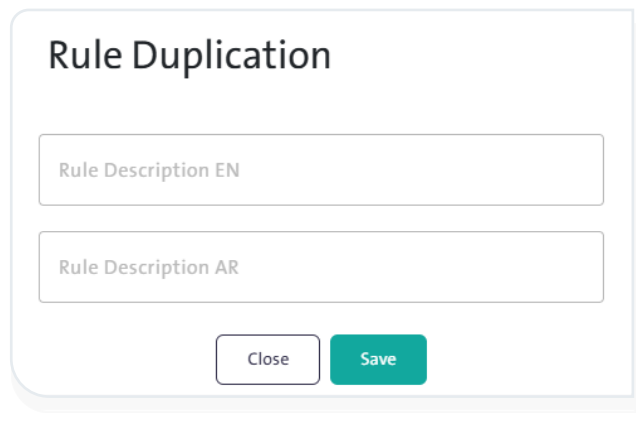
- Edit the rule name through the “Rule Description” field, then click “Save”.
When copying a rule, you can reuse it and make modifications as needed.
2- Conditions: #
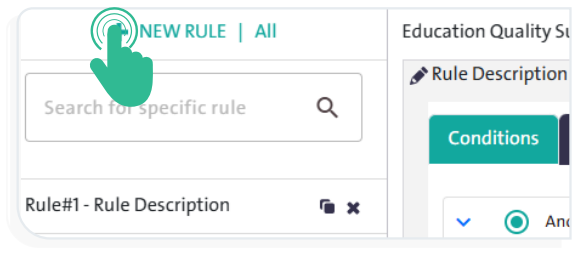
To start creating a rule, click “New Rule” , then select the Conditions tab and follow the sequence below to set up the rule’s conditions:
1-Define the logical operator type for the questions:
You can link the conditions using one of the two available logical operators when creating a new rule, which are:
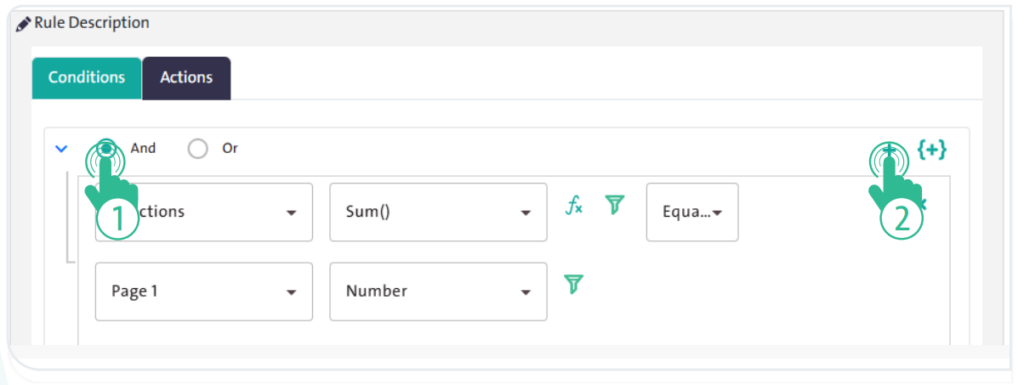
- “AND”:
- Select the “AND” condition to add more than one condition in the rule, where all conditions must be met for the action to be applied.
- Add the first condition, then click “Add Condition”
 to include additional conditions.
- “ OR “:
- Select the “OR” condition to add more than one condition in the rule, where meeting any single condition is sufficient for the action to be applied.
- Add the first condition, then click the “Add Condition” icon to include additional conditions.
- You can delete a condition by clicking the “Delete” icon .
- You can group multiple conditions by clicking the “Add Bracket” icon
 , then add the conditions by defining their type and assigning a logical operator.
 - You can delete a group of conditions by clicking the “Delete” icon.

2-Define the condition type:
The condition types in the system are:
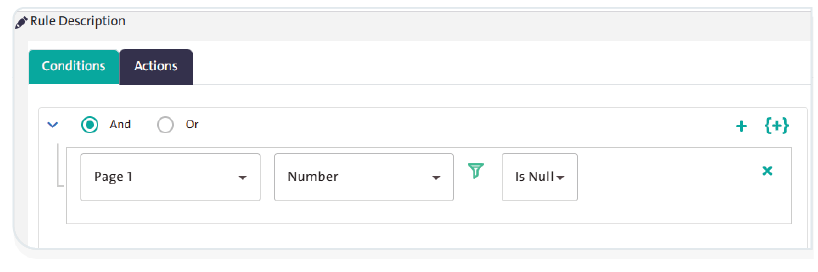
- Page: Select a specific page in the survey, then choose the question to which the condition will be applied. Next, click “Filter”
 and specify the condition operator to be applied, and finally, select the question’s answer.
- Functions: Select the condition type “Functions”, then choose the function name. After that, select the condition operator from the filter, along with the page name and the question.
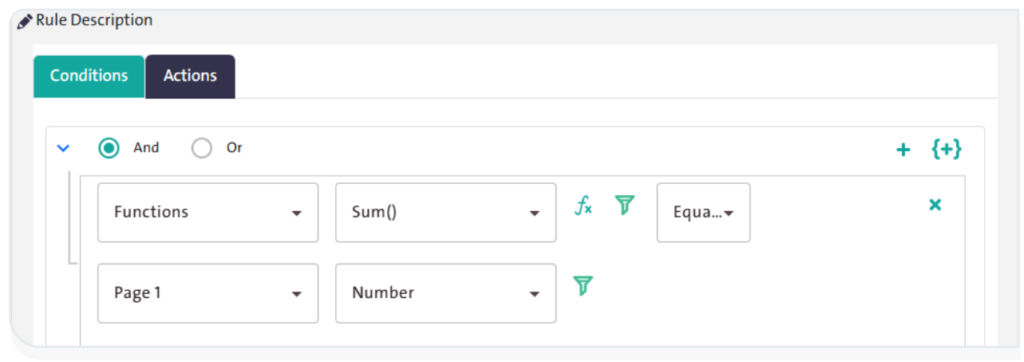
You can apply the mathematical function to a single question or to multiple questions.
- Mathematical Operations: Select the condition type “Mathematical Operation”, then choose the condition operator from the filter, along with either a value, or instead of the value, select a page name and a question within it.
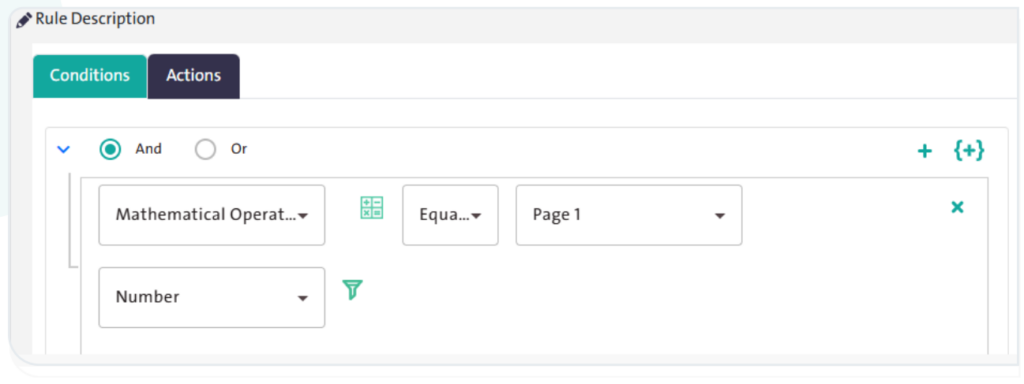
Explanation of the available condition operators that you can use to define the rule status and its descriptions:
- Equals: The same scale, quantity, or number.
- Not Equals: Not the same scale, quantity, or number.
- Greater Than Function: Larger in size, number, or quantity.
- Less Than Function: Smaller in size, number, or quantity.
- Greater Than or Equals Function: Larger than or equal in scale, quantity, or number.
- Less Than or Equals Function: Smaller than or equal in scale, quantity, or number.
- No Value: Has no value.
- Has Value: Has value.
- Matches: Same value as another question; used for text fields.
- Does Not Match: Not the same value as another question; used for text fields.
- Greater Than Question: Greater value than another question.
- Question Greater Than or Equals: Greater than or the same value as another question.
- Less Than Question: Smaller value than another question.
- Question Less Than or Equals: Smaller than or the same value as another question.
- In: The value exists.
- Not In: The value does not exist.
3- Actions: #
- Click “New Rule“ , then select the conditions that fit your rule from the “Conditions” tab.
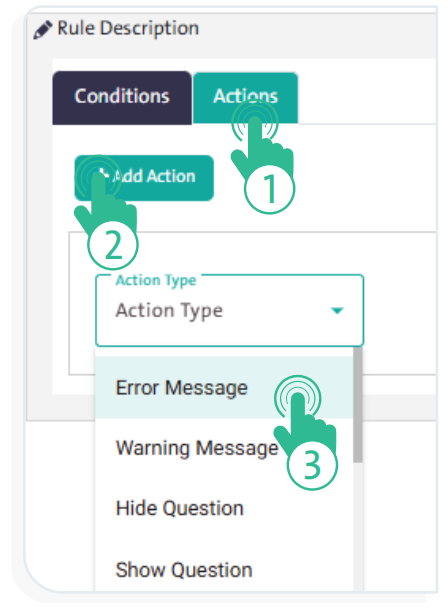
- Go to the “Actions” tab, then select the appropriate action from the dropdown list, which includes options such as:
- Error Message
- Warning Message
- Enable
- Disable Question
- Show/Hide Question
- To add an additional action, click “Add Action“
 , then specify the appropriate action type.
The available actions in Al-Khwarizmi platform include:
| Action | Description |
|---|---|
| Error Message | Use this action to display an error message that alerts the respondent when an invalid value is entered. This message prevents the respondent from proceeding, and the system clears the invalid input so the respondent can provide a correct value. |
| Warning Message | Provides an alert to the respondent when an incorrect value is entered, without preventing them from proceeding. |
| Hide Question | Allows you to hide a question or a group of questions based on a condition or a set of conditions. |
| Show Question | Allows you to display a specific question or a group of questions based on a condition or a set of conditions. |
| Disable Question | Use this action to disable a question based on a specific condition, where the question is displayed but cannot be interacted with. |
| Enable Question | Use this action to activate a question based on a specific condition. The question will appear and be available for use. |
| Hide Control | Allows you to hide a control (such as a page, image, icon, or button) based on the response to a preceding question. |
| Show Control | Allows you to display a control (such as a page, image, icon, or button) based on the response to a preceding question. |
| Enable Control | Activates control so it can be used within the survey. |
| Disable Control | Disables the control to prevent its use in the survey. |
| Show Group | Use this action to display a group (such as an accordion, table, matrix, or tab) based on the response to a preceding question. |
| Hide Group | Allows you to hide a group (such as an accordion, table, matrix, or tab) based on the response to a preceding question. |
| Hide Answer | Use this action to make a question’s answer invisible. |
| Show Answer | Makes a question’s answer visible using this action. |
| Set Value | Use this action to calculate and assign a specific value based on a previously entered value. |
| Action | Use this to navigate between survey pages. |
| Execute Formula | Use this action if you want to write a JavaScript code snippet through a dedicated editor. |
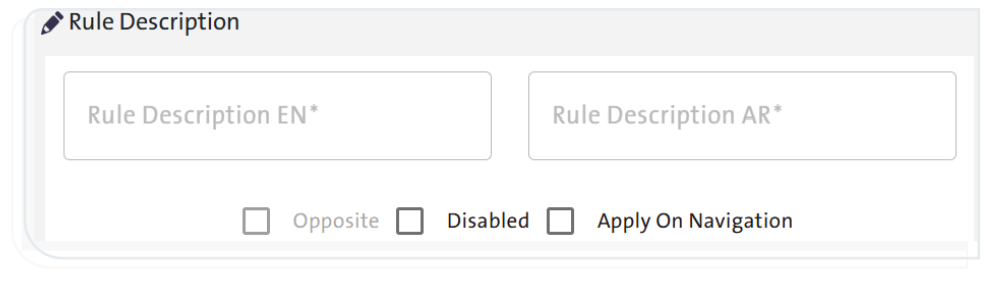
- The “Rule Description” icon
 allows you to do the following:
- Opposite Rule: Enable this option if you want to execute an action when the opposite of the defined condition is met.
- Disable Rule: Enable this option if you want to deactivate a specific action when the defined condition is met.
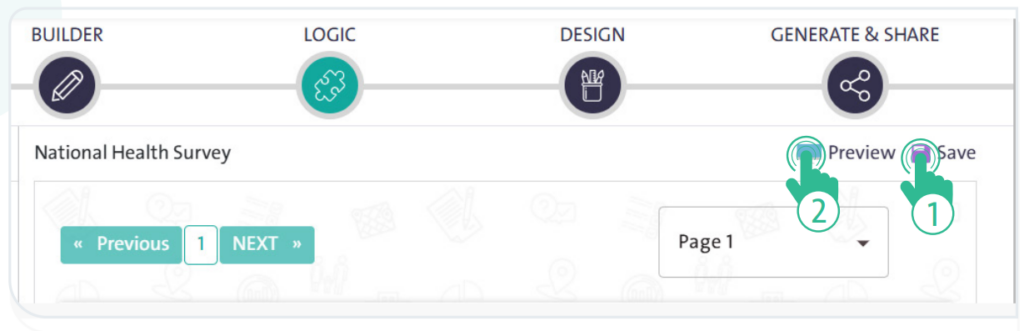
- You can preview the survey — to validate the rule — by clicking “Save”
 , then the “Preview” icon
  .
.
Fourth: “Design” Tab: #
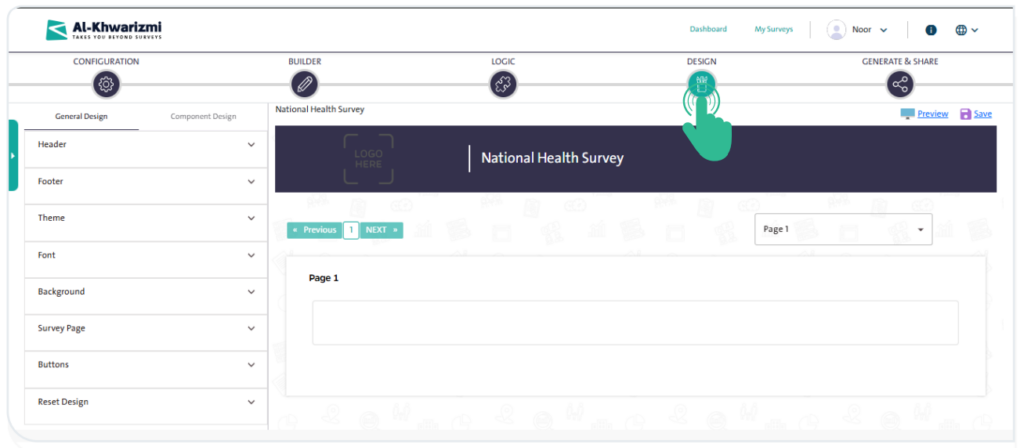
The Survey Designer provides the ability to customize your survey’s design through the Design options, which consist of two main choices: General Design and Component Design.
1- General Design: #
The General Design tab allows you to design the survey using several ready-made options, including:
Header:
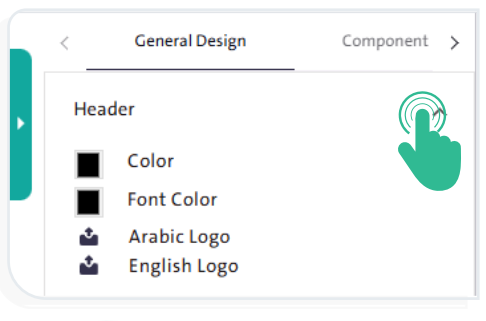
You can change the design of the survey page header by following these steps:
- Select the header color and the font color from the color picker panel or enter the HEX code or RGB code of the desired color directly below the color picker.
- Upload the survey logo – if available – from your device by clicking the “Arabic Logo” icon or “English Logo” icon and the logo will appear directly in the header.
Footer:
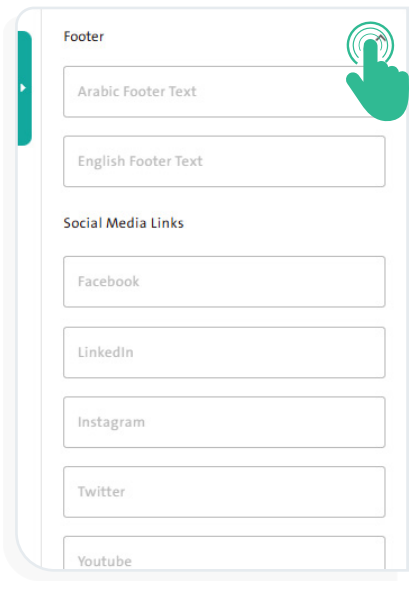
You can modify the design of the survey page footer by adding the content you consider important for the respondent by following these steps:
- Select the appropriate footer color and font color.
- Enter the text you want to appear in the footer in the “Arabic Footer Text” field and “English Footer Text” Field.
- Add the social media links in their corresponding fields, so their icons appear at the bottom of the survey page.
Font:
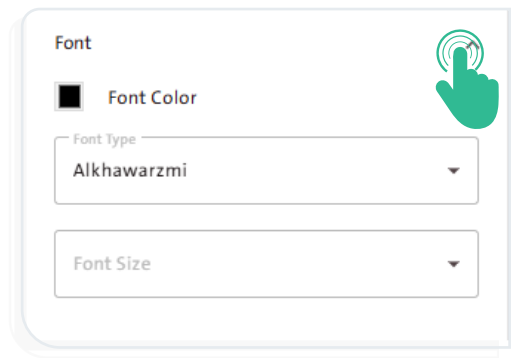
Al-Khwarizmi platform allows you to change the font used in the survey page by following these steps:
- Select the font color from the color picker panel or enter the HEX code or RGB code of the desired color directly below the color picker.
- Choose the font type from the font list
- Select the font size.
Background:
You can change the survey background by following these steps:
- Select a suitable background type from the available options:
- Image
- Pattern
- Gradient
- Color
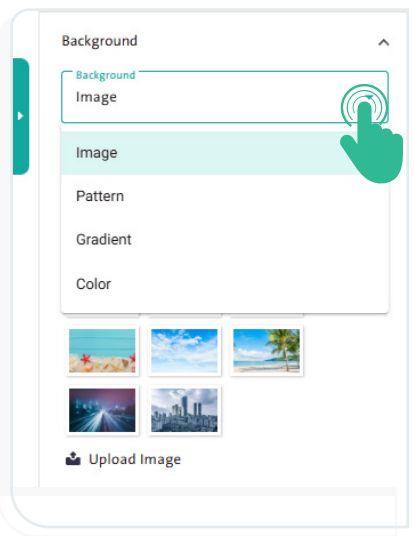
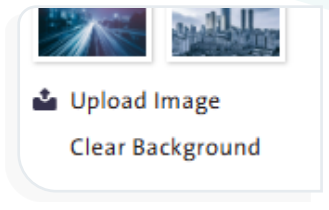
- You can upload an image or a pattern from your device.
- To remove the background after applying it, click “Clear Background”.
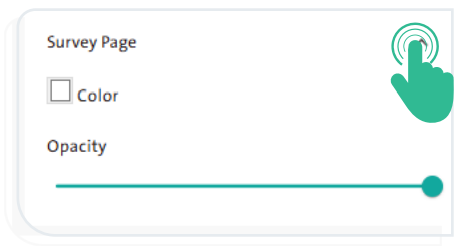
Survey Page:
You can modify the survey page color by following these steps:
- Select the form page color from the color picker.
- Adjust the “Opacity” slider to control the page transparency level.
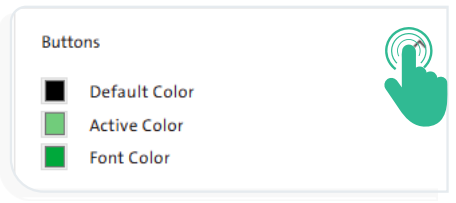
Buttons:
You can control the button colors on the survey page by following these steps:
- Select the default button color from the color picker panel; this color appears when the button is displayed in its normal state.
- Select the active button color from the color picker panel; this color appears when the mouse hovers over the button or when it is clicked.
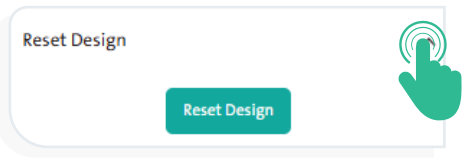
Reset Design:
The system allows you to restore all default design settings by clicking “Reset Design”
1- Component Design: #
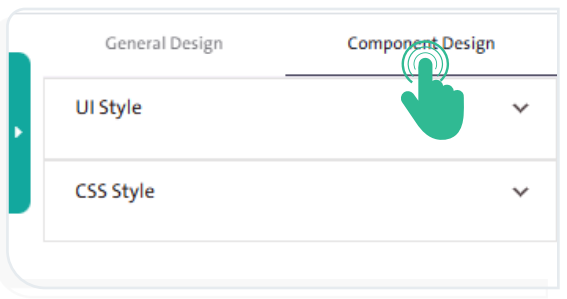
To further customize the survey design options, you can use either Visual Design or CSS Design as follows:
Visual Design:
You can change the design of the survey page header by following these steps:
- Select “UI Style” from the “Component Design” tab.
- Choose a control, then click “Edit” to display the visual design options.
- Enter the font type, color, and size.
CSS Design:
- Select “CSS Style” from the “Component Design” tab.
- Write the code in the CSS editor.
To modify the design options of a specific control individually, click the “Edit” icon  next to the control title, then specify the font type, size, and color as desired.
Fifth: Generate & Share Tab #
The Create & Publish tab is used to define the steps and procedures for publishing the survey. It represents the final step in the survey creation Wizard and includes two steps:
1- Generate Tab: #
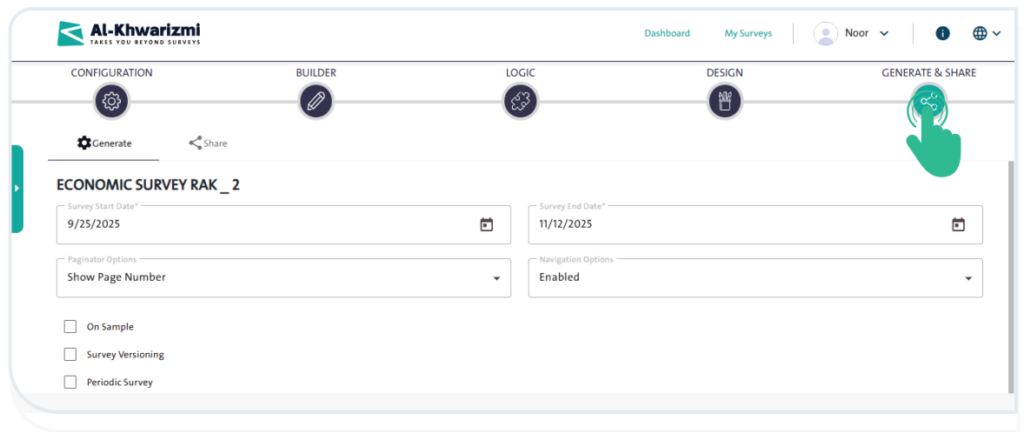
- Specify the Survey Start Date: the date when data collection begins.
- Specify the Survey End Date: the date when data collection ends.
- Set the Paginator Options: to choose how page numbers are displayed in the survey.
- Set the Navigation Options: to enable or disable page-to-page navigation.
- Select one or more of the following options, if applicable:
- On Sample: enables data collection based on a predefined sample file.
- Survey Versioning: allows creating and managing multiple versions of the same survey.
- Periodic Survey: enables repeating the same survey at specific intervals (e.g., monthly, quarterly, or annually).
- Specify the Survey for Production: select the survey unit (page) that will be used for publishing the survey.
- Specify the Survey Unit, which consists of the pre-designed survey pages.
- Click “Generate Survey”
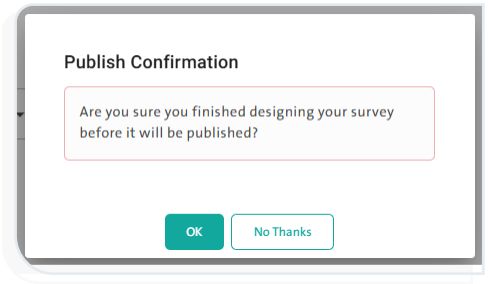
 ; the “Publish Confirmation” window will then appear.
- Select “OK ”
 if you have finished building and designing the survey.
 - Select “No, Thanks ”
 to go back and continue building and designing the survey.
- The process of publishing your survey depends on the “Data Collection Source” option that you previously selected in the “Settings” tab, where the available data collection modes will appear as follows:
Weblink-Collection: Collecting data by sending an electronic link to respondents. This mode is divided into two types:
Public Self-Collection:
Publish the link to respondents via email or social media platforms.
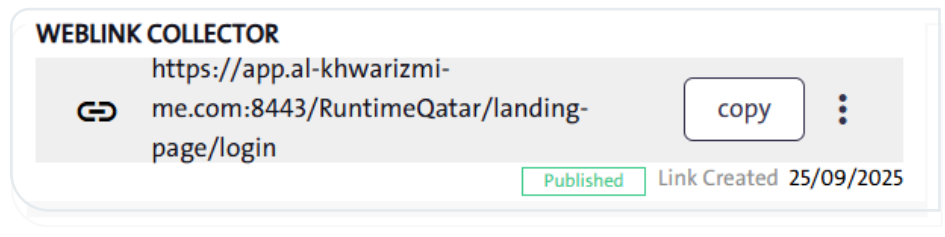
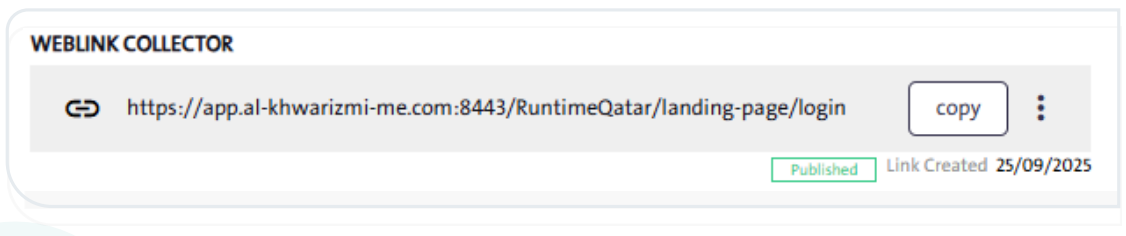
Private Weblink-Collection:
Publish the link to specific, designated respondents.
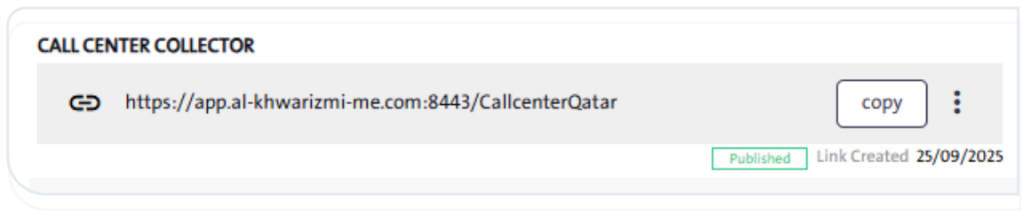
Call Center Collection: Obtain the call center link for the survey.
Field Collection: Collecting data by providing the fieldworker with an electronic link. This mode is divided into two types:
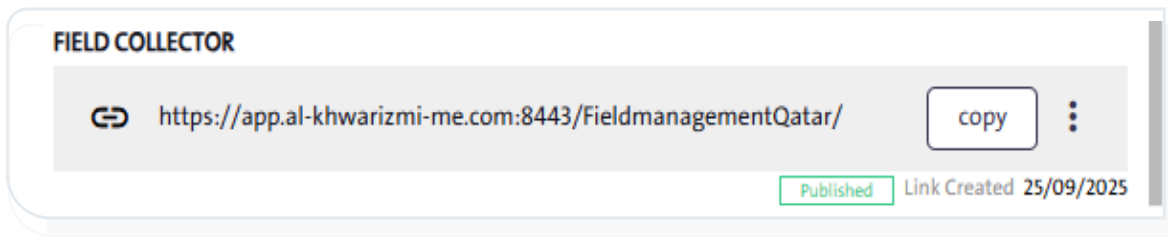
Within Maps:
Provide the fieldworker with the survey link, which operates within predefined geographic locations.
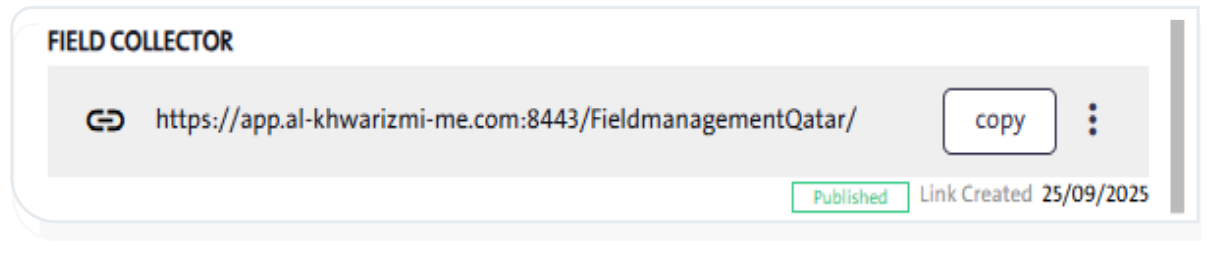
Within List:
Provide the fieldworker with the survey link, which contains a predefined list of respondents.
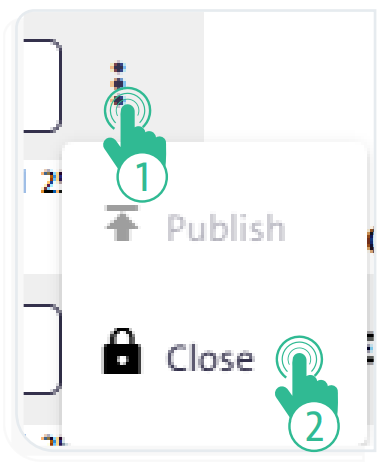
To close the survey, click “More”  and select “Close” from the dropdown list. This option will prevent respondents from filling out the survey.
2- Share Tab: #
This tab allows you to configure the survey sharing settings, and it includes the following options:
– Settings: #
The available options in “Settings” depend on the data collection source you previously selected, and the following options will appear:
- Display the progress bar in the survey.
- Set the maximum number of respondents.
- Prevent multiple submissions from the same respondent.
- Record respondents’ IP addresses.
- Require a password change on first login.
- Allow reopening the form after submission.
- Send an automatic thank-you email to respondents who have successfully completed the form.
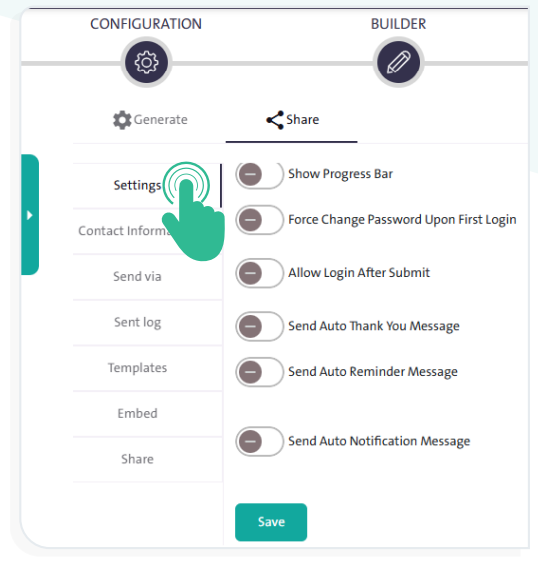
- Send an automatic reminder, with configurable date, time, and recurrence, to late respondents or those who have not finished filling out the form.
- Send an automatic notification when the survey ends after reaching the required number of respondents.
– Contact Information: #
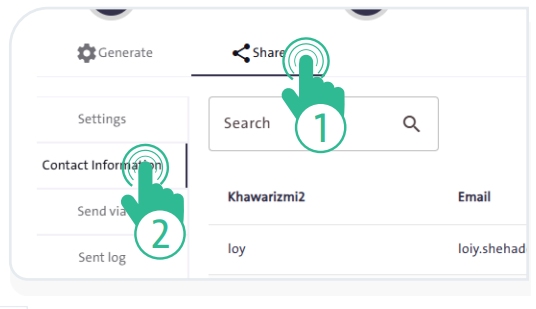
Through the Contact Information tab, you can perform several tasks:
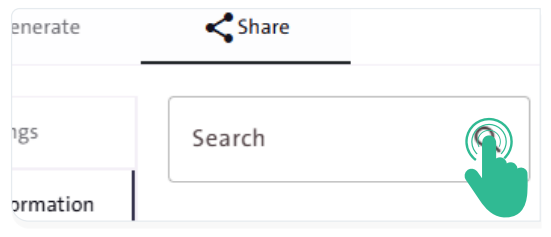
- Search for an existing contact to send the form to by typing the name or email in the search field.
- Add new contacts through:
– First: An Existing List:
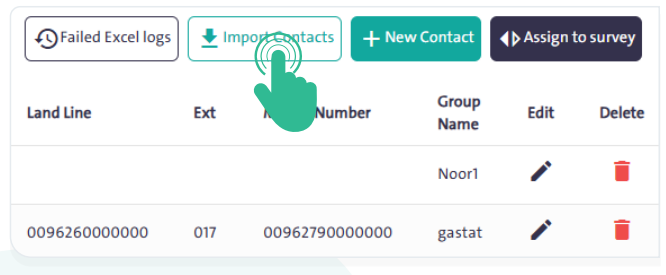
- Click “Import Contacts”
- Download the Excel template by clicking “Download the Template”
 The file includes the following data:
– Number
– Name
– Email
– Landline Phone
– Extension
– Mobile Phone
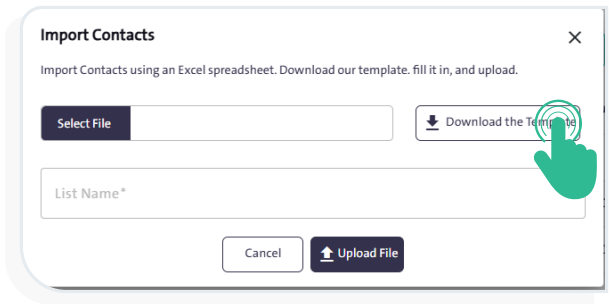
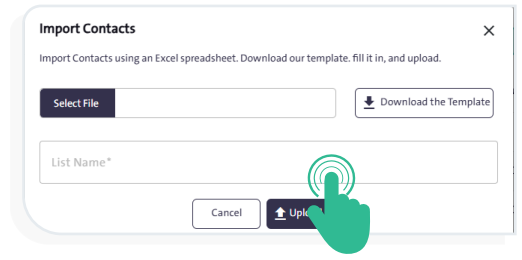
- Specify a name for the contact list by entering it in the “List Name” field.
- Upload the file to the system by clicking “Upload File”.
– Second: New Contacts:
- Click “New Contact”
 ; a window will appear where you can enter the details of the contact you wish to add.
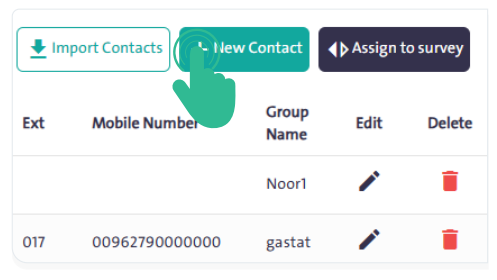
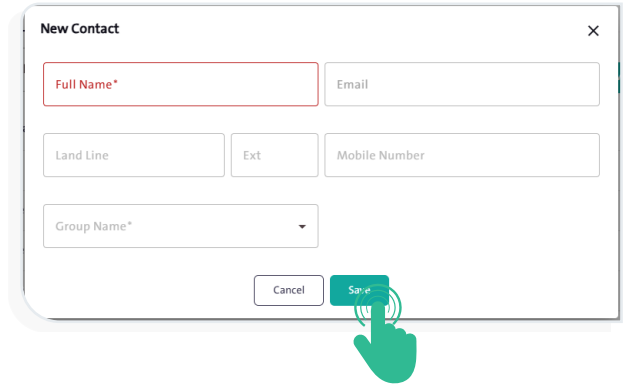
- Enter the full name and select the group name as mandatory primary information for the contact. Then, you can add email, landline number, extension, and mobile number.
- Click “Save”
 to store the contact information within the selected group.
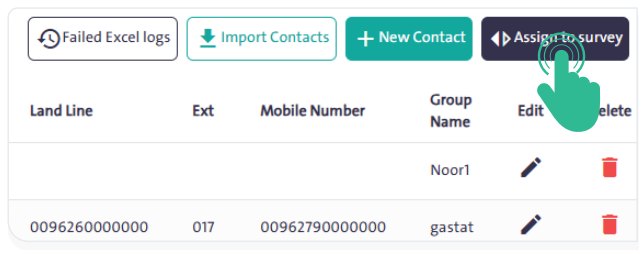
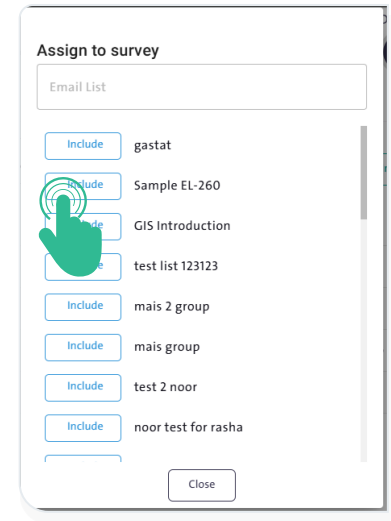
- Assign the survey to a mailing group as a defined target audience. Click “Assign to Survey ”
 ; a window will appear where you can select the group either by searching for its name or by choosing it from the available groups, then click “Include”
- Delete a contact from the contact list by clicking the “Delete” icon
 next to the contact’s name in the list.
 - Edit an existing contact’s information by clicking the “Edit” icon
 next to the contact’s name in the list.
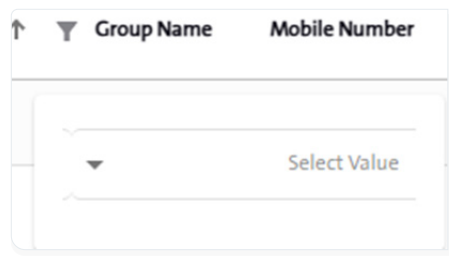
- Filter contacts by group name by clicking the “Filter” icon next to “Group Name”, then selecting the group name from the dropdown list.
– Send Via: #
The Send Via tab allows you to choose how to deliver the survey to respondents—via Email or SMS.
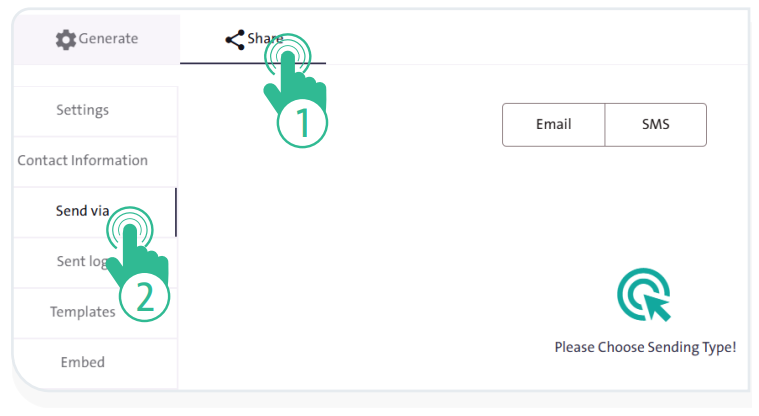
First: “ Email“:You can send the survey to a respondent or a group of respondents by following these steps:
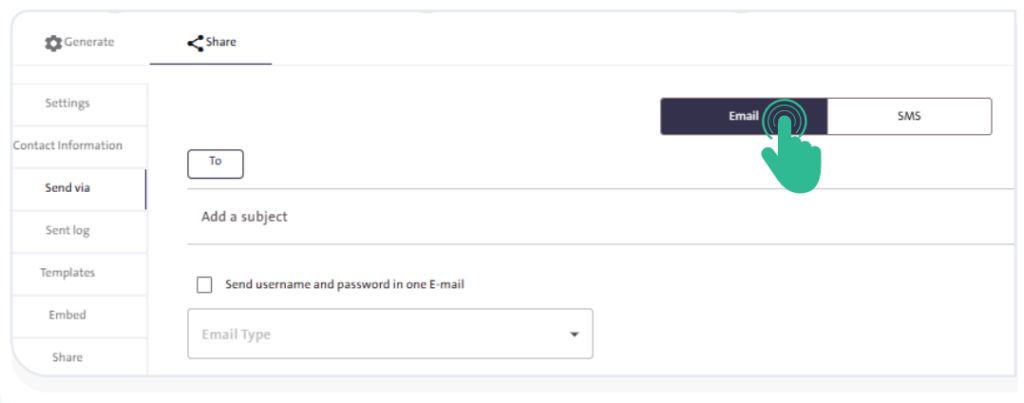
- Select the contacts to whom you want to send the survey by clicking “To”
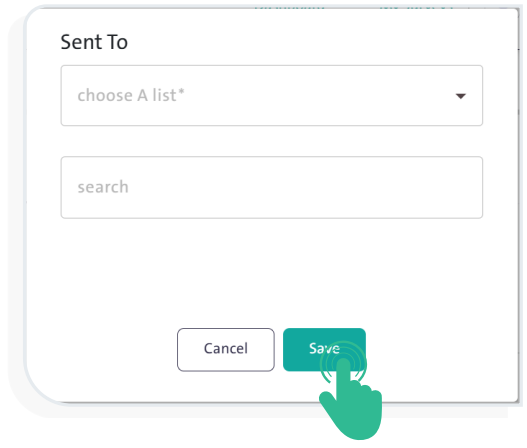
 , then choose the email addresses from the previously entered contact list—either the entire list or a subset of it. You can also enter an email manually in the search field. Finally, click “Save”
- Enter an appropriate subject for the message.
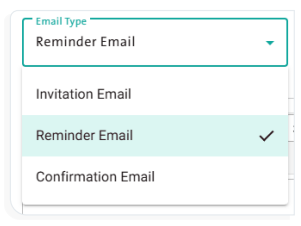
- Select the email type. Al-Khwarizmi platform provides ready-made templates for different types of messages, including:
- Invitation Email
- Reminder Email
- Confirmation Email
- Edit and format the message text.
- Click “Send”
 once the email is fully prepared.
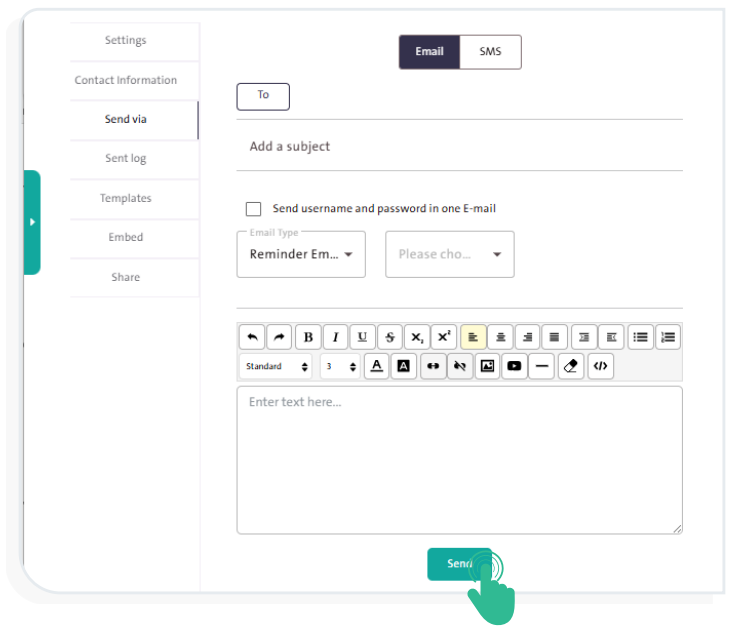
The email sent to the respondent, which contains a unique survey link, includes: the username (respondent’s email) and a password automatically generated by the system.
Second: “SMS“:
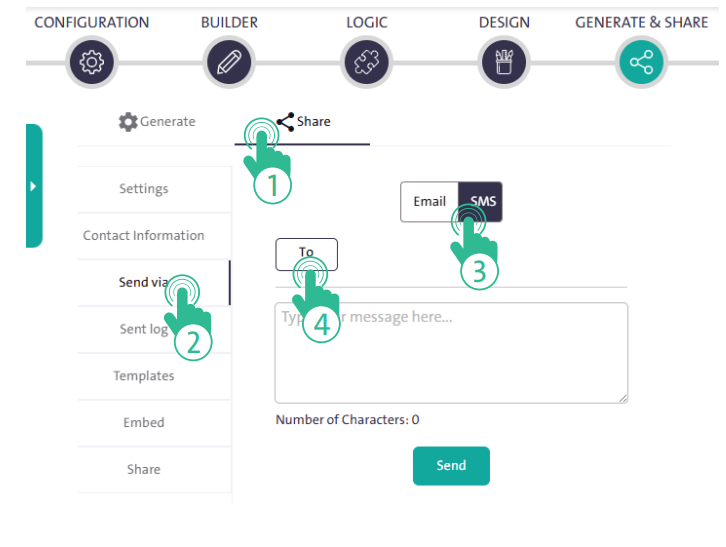
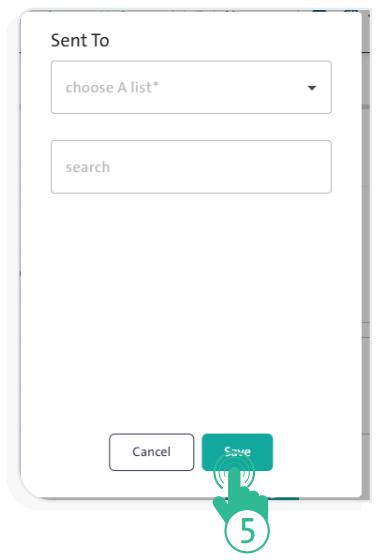
- Select the contacts to whom you want to send the survey by clicking “To”
 , then choose the group from the dropdown list or search for it by entering the group name or email address in the search field. Finally, click “Save” .
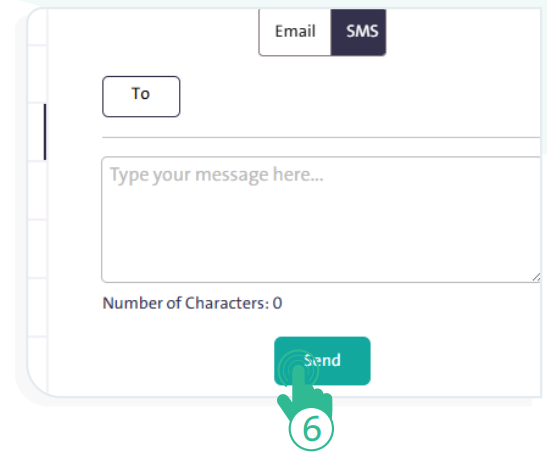
- Write the text message content.
- Click “Send” once the message is ready.
– Sent Log: #
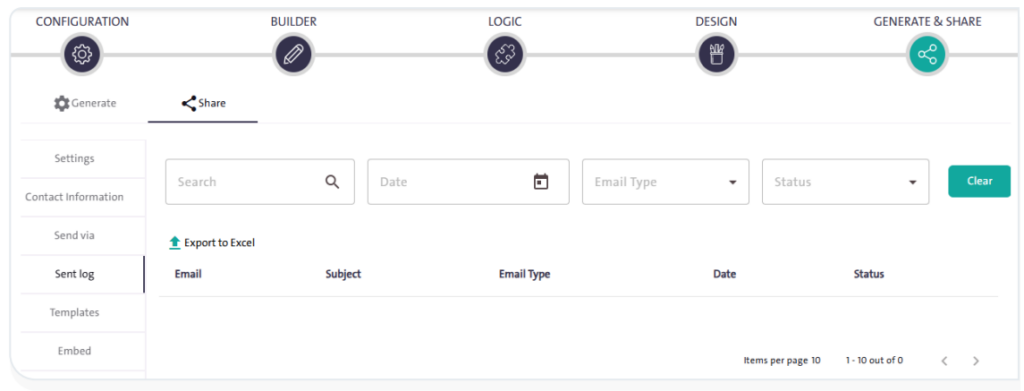
The Sent log tab allows you to:
- View a summary of the messages sent through Al-Khwarizmi platform, including email, subject, email type, date, and status.
- Clear the filter fields by clicking “Clear”
 .
.
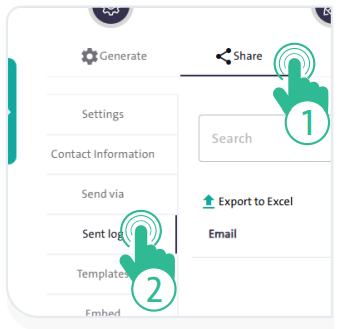
- Use the search box and filter options to refine the results for specific messages by date, email type, and status.
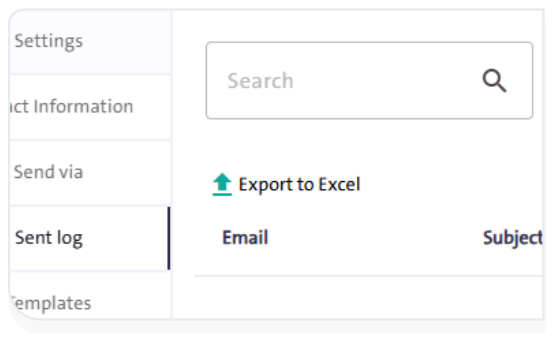
- Export the message summary to Excel format by clicking “Export to Excel”.
– Templates: #
The “Templates” tab displays a collection of ready-made email templates that you can browse, use directly, or customize when sending emails. These include:
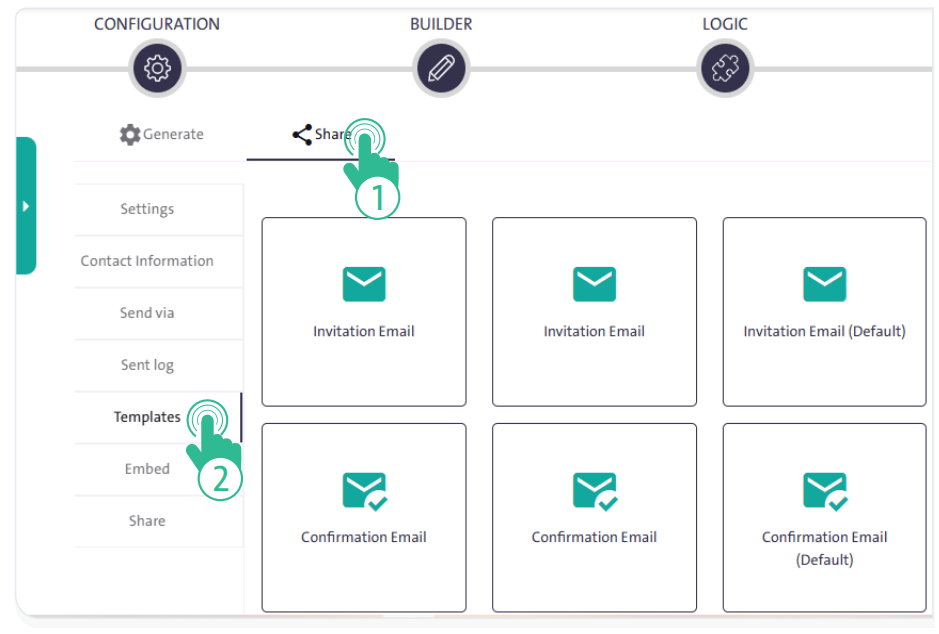
- Invitation Email
- Form Submission Email
- Password Email
- Password Invitation Email
- Reminder Email
– Embed: #
The “Embed” tab provides you with a set of codes that can be used after creating the survey, depending on how you want to publish it. These include:
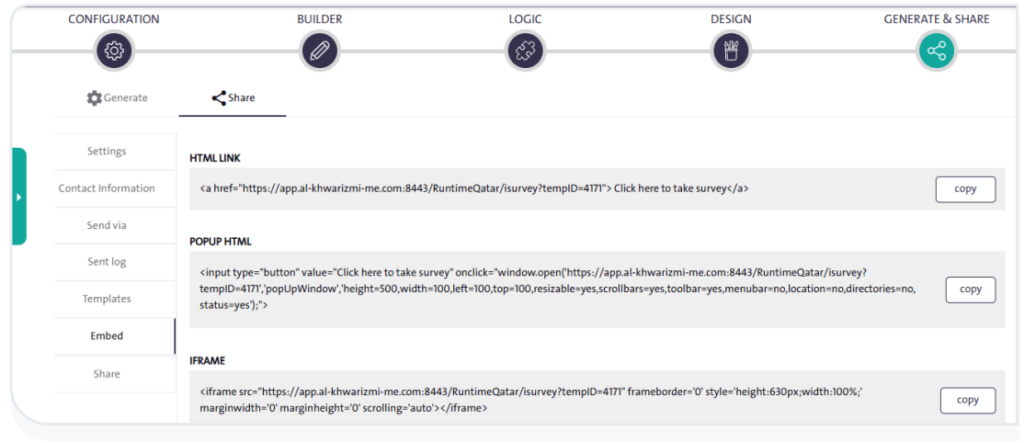
- HTML LINK
- POPPUP HTML
- IFRAME
– Share: #
The “Share” tab simplifies the process of publishing the survey through two methods:
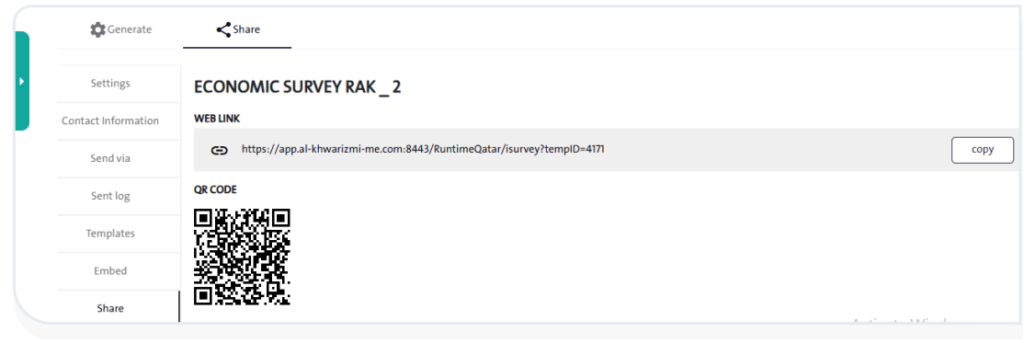
- Web Link:
Copy the survey link and paste it into the platform where you want to publish it by clicking “Copy”.

- QR Code:
Copy the QR code image and paste it into the platform where you want to publish the survey.
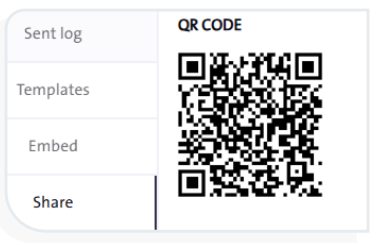
Publishing a QR code makes it easier for respondents to access the survey using their smartphones.
